
To create new surveys, start by navigating to the Surveys tab within your workspace. Surveys can be created manually, generated from existing documents and/or instructions, or imported from the Survey Library.
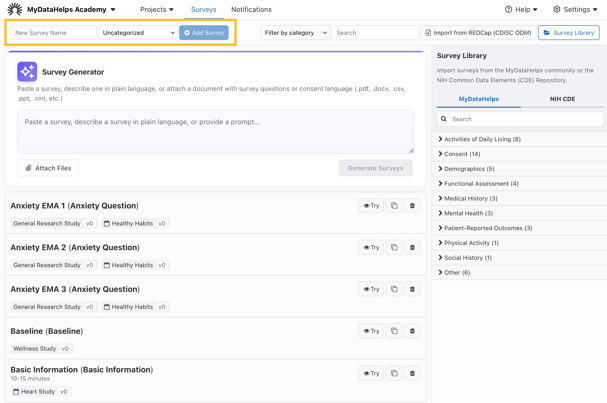
To manually create a new survey, start by entering a survey name where it says “New Survey Name” and click “Add Survey”. Optionally, assign a category to the new survey. From there, you can continue to manually configure the survey or use the survey copilot to make changes.
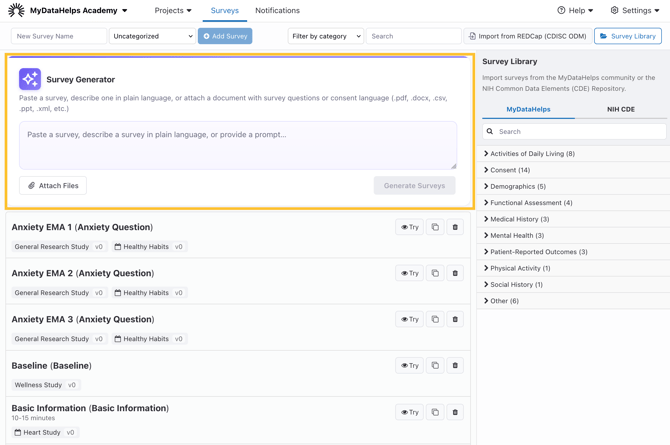
Survey Generator
Alternatively, you can use the Survey Generator to build one or more surveys at once. Simply provide a written description of the survey(s) you want to create and/or upload available documentation in the Survey Generator box. You can upload documentation such as consent forms, protocol documents, data dictionaries, exports from products like REDCap or Qualtrics, and documented instruments.
You can provide written instructions for what to do with attached documents, e.g., "combine these measures into a single survey."
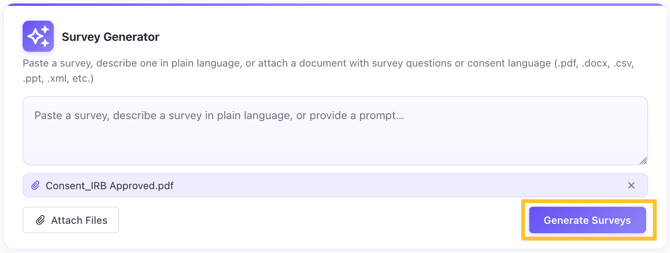
 Once you have uploaded all of your available documentation, click "Generate Surveys."
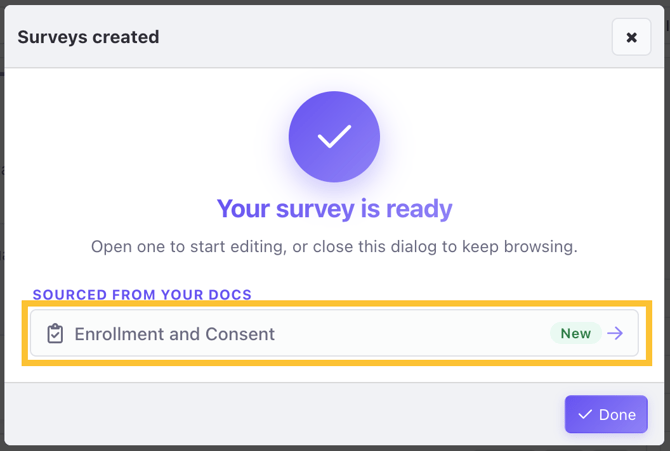
 After a few minutes, you will see a list of the survey(s) created, and you can click any of them to begin editing that survey directly.
 Most of the following steps to create the survey will have been completed automatically, but you should review them for accuracy and test them before publishing to participants. Documents are processed by a commercial AI model using a "non-retention" policy, so no uploaded documents are retained or stored by MyDataHelps or the AI platform.
Selecting a Survey Type
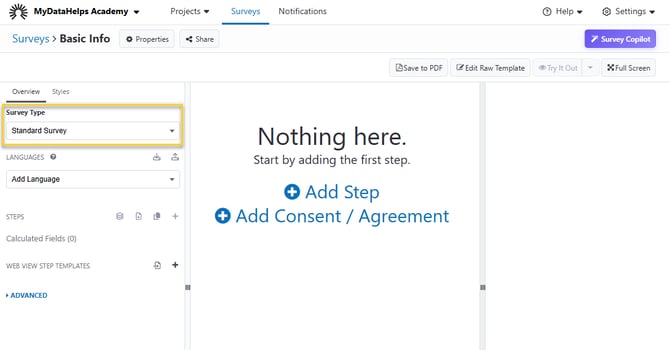
The first thing you may see when setting up a new survey is the survey type drop-down on the top left of the editor. Most surveys that you will create will probably be a “Standard Survey,” but, in some cases, you may also want to deliver an Ecological Momentary Assessment or an active task.
Configuring Steps for Standard Surveys
Surveys are simply a series of steps that are presented to the user. By default, they are presented in sequential order, but you can add branching rules to skip steps depending on the participant’s answers.
If you are creating a standard survey, steps can be added using the Survey Copilot or manually. As you add steps, you can click and drag them in the left pane to rearrange them. If you have a consent or form items within a step, you can click on the Step's Identifier to expand it, showing all the items. These items can also be dragged and rearranged, either within the current step or to a another step, which doesn't have to be the same step type. You can also move question steps into form steps.
Configuring Steps Using Survey Copilot
Launch the Survey Copilot by clicking the "Survey Copilot" button in the upper right corner of the survey editor. From there, you can attach files, describe the change, or select from a list of preset prompts.
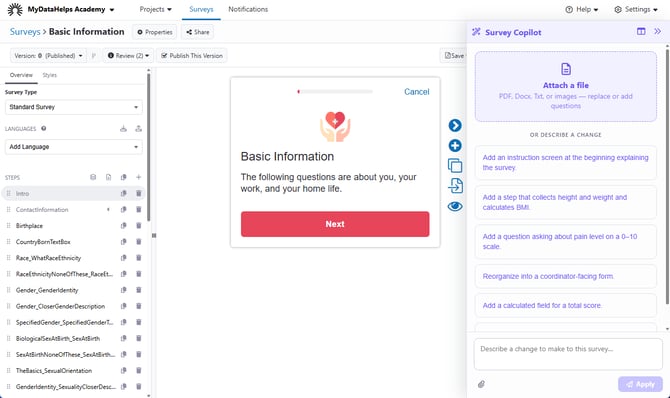
Once the copilot makes the requested changes, you can edit the steps as needed then save or revert the changes.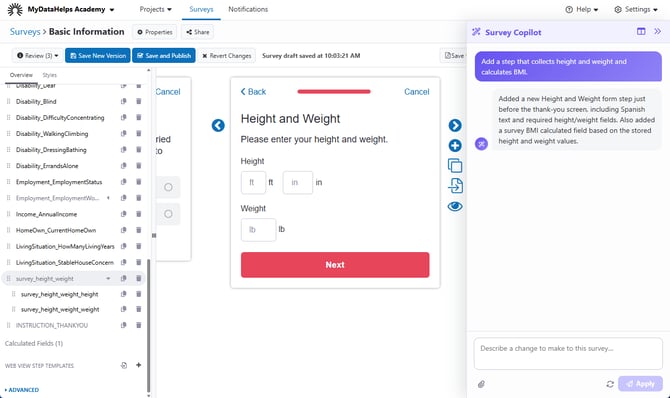
Manually Configuring Survey Steps
To manually add steps, click “Add Step” from the initial screen or the "+" from the left pane or to the right of the current survey step. Select “Step Type” on the right to select from question steps, instruction steps, consent steps, and more.
For each question in a question or form step, MyDataHelps supports various answer formats.
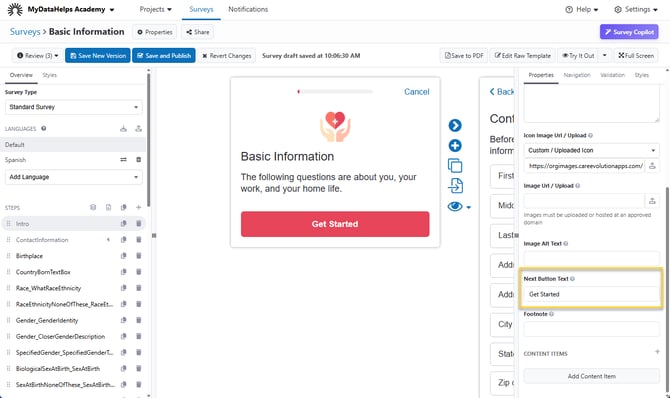
When you make changes to the step properties on the right, you will see the changes immediately reflected in the preview view in the middle of the screen. For example, you can change the default button text of "Next" or "Done" at the bottom of the survey step by editing the "Next Button Text Text" field. This field can also be localized.
Identifiers
For each step or form item (for a form step) you create, it’s important to use a meaningful identifier. The identifier is the key by which the data for the step will be stored. For instance, if you have a question with the identifier of “smoking_lastyear” the result of that question will be stored in a variable called smoking_lastyear.
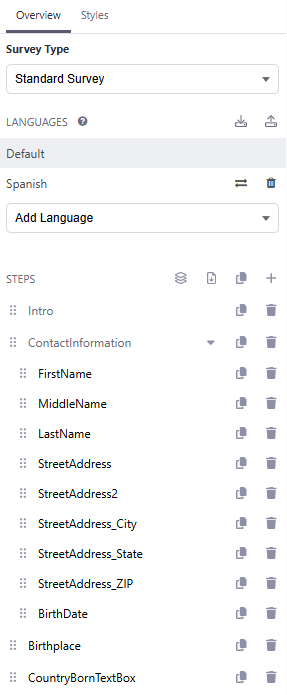
The navigation on the left pane shows all step and result identifiers. Result identifiers store survey results and highlighted in black (step identifiers that don't contain a specific result are in gray). You can collapse or expand form steps to show/hide their corresponding result identifiers. Drag and drop steps to change the order in which they're presented.
Creating Calculated Fields
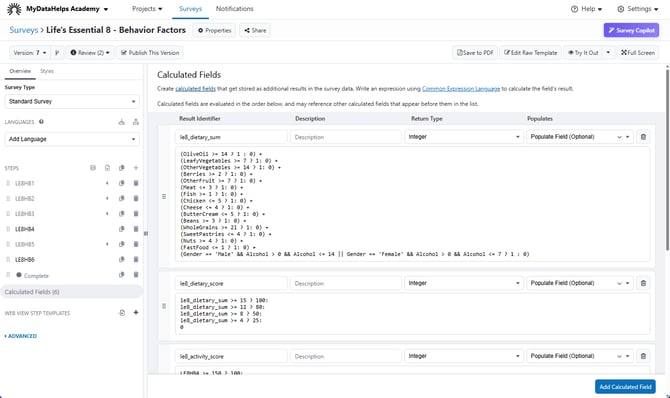
If your survey is designed to generate a score, such as a PHQ-9 or GAD-7, or you want to classify a survey answer for the purpose of sending a particular notification, you can create one or more calculated fields. These utilize the MyDataHelps Common Expression Language to perform a wide variety of possible calculations or other functions from current and previous survey answers.
Styling Surveys
There are a wide range of options to apply different visual styling to surveys so they match your project or organization's branding and design guidelines. See Changing a Survey's Look and Feel and Formatting Survey Text for more detail.
Previewing, Testing, and Exporting Surveys
Before you send your survey to participants, you'll want to review it and potentially obtain screenshots to submit to the IRB for approval.
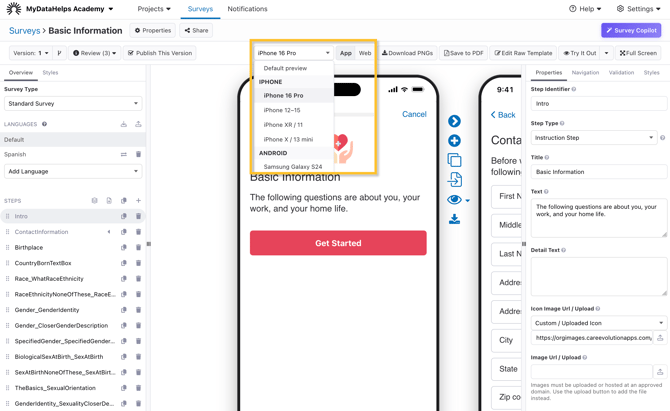
If you'd like to preview your survey to see what it will look like on different platforms (e.g., iPhone, Android, or web), you can click the Preview drop-down and select an option and toggle between App and Web:
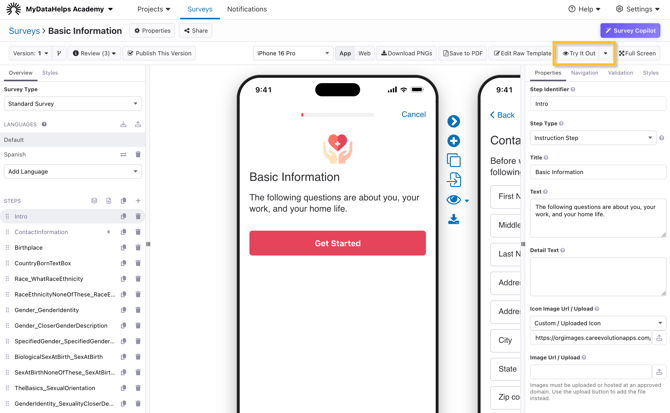
For simple surveys, the "Try It Out" button will let you test your survey without collecting any data. You can also click on the eye icon to try out your survey from a particular step. See Testing Projects and Surveys for more advanced testing options.
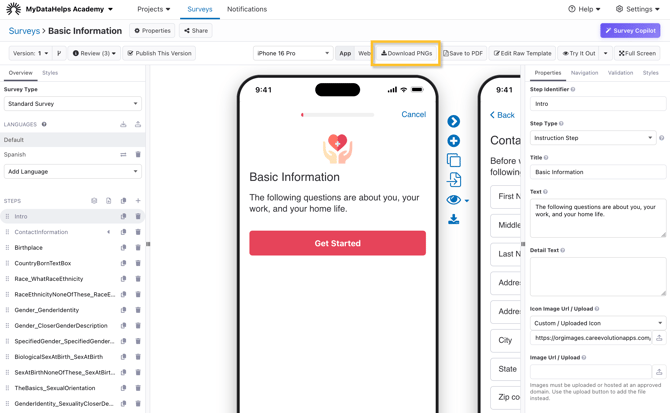
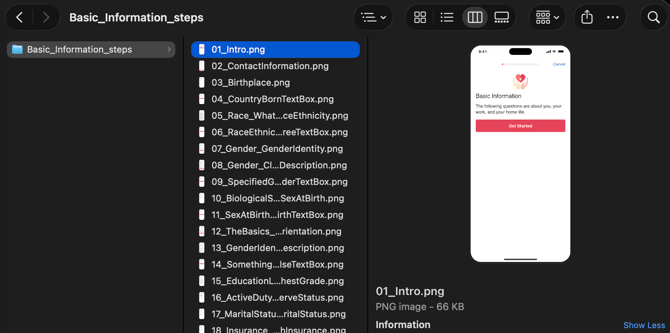
If you need an export of survey screenshots, such as for an upcoming IRB submission, you can click Download PNGs to obtain images of all survey steps.
Advanced Survey Options
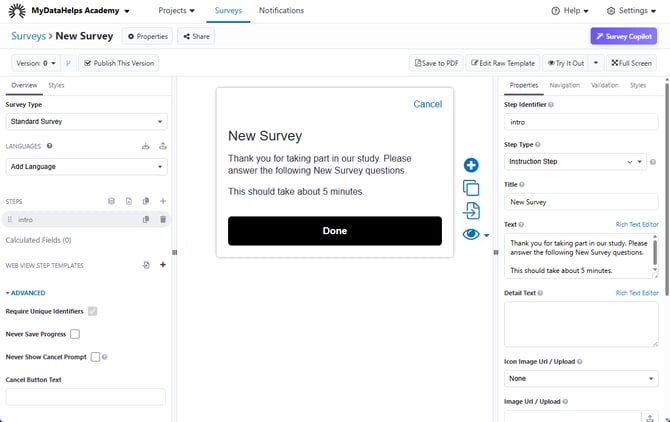
Additional survey options can be found in the "Advanced" dropdown in the left pane. Require Unique Identifiers (i.e., all identifiers defined within the survey) and Saving progress (i.e., the ability to quit a survey and resume later) are enabled by default. From this menu, you can also disable the cancel button as well as customize the text of the "Cancel" button shown on each step.
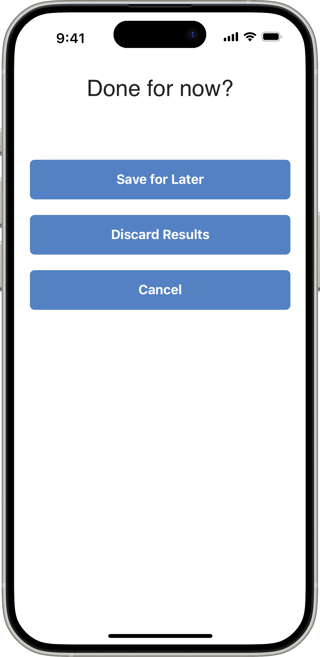
The Cancel Prompt offers the choice to save or discard survey results, if enabled.
If a new version of the survey has been published since the participant previously saved their progress, they will restart at the beginning of the survey.
Updating Survey Properties
Refer to our Survey Properties article for more information on configuring various survey properties.
Categorizing Surveys
A survey category can be assigned when first creating a new survey or within the Survey Properties of an existing survey. Categorizing surveys allows you to easily filter your surveys by group rather than searching through all of your project’s surveys.
Filtering Surveys
To filter your surveys based on Survey Category, select the Filter by category dropdown in the Surveys tab. Select the desired survey category. The surveys in the list will automatically filter all of the workspace’s surveys by the designated category.

Versioning, Saving, and Publishing
Refer to our survey versioning & publishing article for more information.