Segments are a powerful tool that allows you to track participant milestones and drive actions. See below for segment best practices, as well as examples of how segments may be useful for your project.
Defining Segments
The following best practices discuss when to create segments, primarily for monitoring participant milestones as well as schedules, as well as how to control the data displayed using segment layouts.
Milestones
Many teams find a benefit from monitoring participants grouped by their current milestone. Consider the various milestones of your project, e.g. Baseline Survey Complete, Surgery and Post-Surgery Survey complete, etc. You’ll likely want to create segments for each of these milestones, especially if coordinator intervention is required.
Once you have defined your milestones, you may find that you have two kinds:
- Milestones based on days, survey completion, or other events/data in MyDataHelps
- Milestones based on events external to MyDataHelps
For milestones related to MyDataHelps activity, refer to the Filter Criteria Types article for information on how to define these segments. If you have milestones that depend upon events external to MyDataHelps, consider creating a coordinator survey to record when the milestone occurs. Then, you can use Survey Answer filter criteria to determine when the milestone occurred.
Schedules
Segments can be especially useful for certain schedule types, such as On Entering Segment, Event-Based, or Date-Based. For example, if you want to update a participant's status to active as soon as they complete baseline and share device data, you could create a segment to track these participants as well as a schedule that updates their status on entering the segment. Alternatively, let's say you want to deliver a weekly survey to those same participants, starting one week after entering that segment. You could use an event-based schedule that runs based on when the participant entered that segment.
Segment Layouts
In addition to defining the segment criteria, you can also define what data displays when the segment is viewed. This can be especially useful for segments that drive action, such as coordinator outreach, since you can add coordinator surveys to the segment layout. You can create shared layouts to be applied across segments, or configure a custom layout, if needed. See Filtering With Participant Segments for more information.
Organizing Segments
The following best practices will help you to keep your segments organized by highlighting important segments at the top of the screen, utilizing categories to group segments, and determining a naming convention to control the order in which they appear.
Featured Segments
Study coordinators can select specific segments to always display at the top of the Participants tab, allowing them to efficiently manage participants by focusing on key segments in one location.
First, create the segment(s) you'd like to feature. To add or edit which segments are displayed, click the gear icon, then select Edit Featured Segments.

From here, you can rearrange the existing featured segments (use the 6-dot icon), delete them (trash icon), or add new ones (+ button). Click the green check mark to save your changes.

When a segment is added to display at the top of the Participants tab, the same view applies to all users in the project.
Categories
Segments can also be ordered by categories. Categories can be especially helpful for projects with different treatment groups, sample collection sites, etc.. To set up segment categories for your project, you can create a segment, select "Create a New Category", and enter your segment category name.

Once you have created a new segment category, you can then select the segment category for future segments.

After creating and selecting your segment categories, you will be able to view your segments based on their assigned segment category within the "Participants" tab.

Naming Convention
MyDataHelps Designer organizes segments in alphabetical order. To order segments in a manner that is functional and defines the segment, consider prefixing your segment names with numbers (e.g. “01. Segment A”, “02. Segment B”, etc.) to ensure they appear in an order that works for you and your team.
Creating Segments: Examples
The following sections review practical applications for segments that may be useful for building your study.
Copy Segment to New Project
Teams often create Dry Run (or testing) projects to try new functionality or features before releasing to a Production (or live) project with actual participants (refer to Testing Your Project). Instead of recreating segments across both projects, which takes time and increases the potential for human error, simply copy a segment from Dry Run to Production with a few clicks, as shown below. Alternatively, this can also be done via Project Compare.
To copy segments from project to project, users must have "Project Builder" and "View/Manage Participants in All Segments" permissions. Update organization permissions by selecting Settings at the top of the page and then clicking Teams from the list of organization settings.
Enrollment Reminders
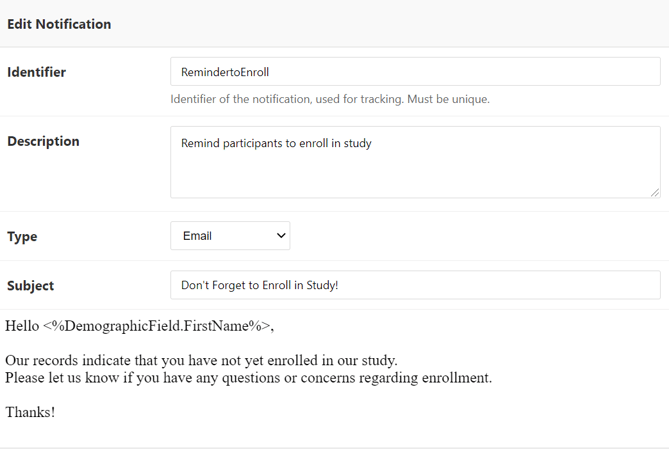
You may wish to send reminder notifications to participants invited to your study, but have not yet enrolled. This example reviews creating an email notification, creating a segment, and creating a schedule to notify all participants who were invited to participate over 1 week ago and have an invitation status of pending.
First, create the email notification to send to participants.
Next, define the participant segment. In this scenario, participants were invited to the study by the coordinators, so you can use the Creation Date and Invitation Status criteria to determine if a participant was created in MyDataHelps over a week ago and has a status of pending.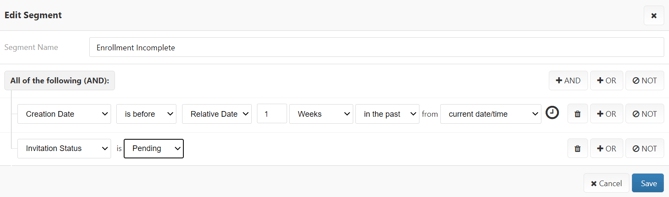
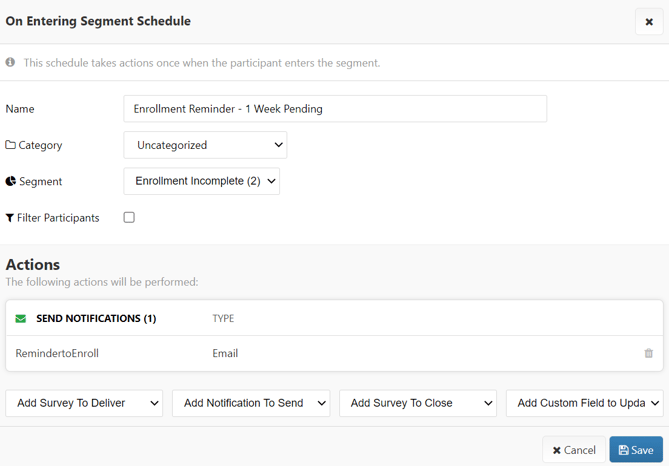
Finally, create a Schedule to send the email reminder to participants on entering this segment. This results in a one-time notification for any participants that were invited over 1 week ago and have an invitation status of pending.
Cohort-Based Notifications
You may wish to divide participants into separate cohorts and send notifications based on those assigned cohorts. In this example, participants are assigned to a cohort based on a survey response, and the cohorts are used to determine the frequency of notifications.
- Cohort A receives 0 notifications
- Cohort B receives 1 notification per week
- Cohort C receives notifications every other day
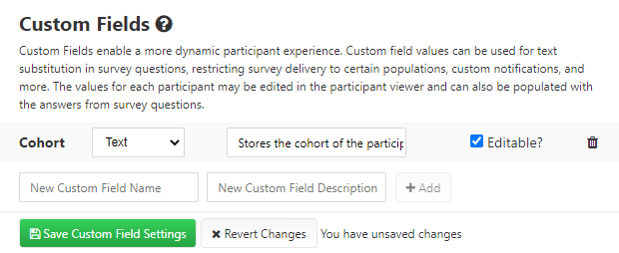
First, create a custom field to store the cohort survey response in.
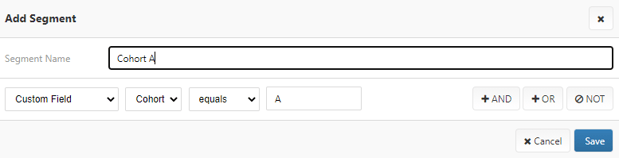
Once the custom field has been created, create a segment for each cohort (Cohort A example below).
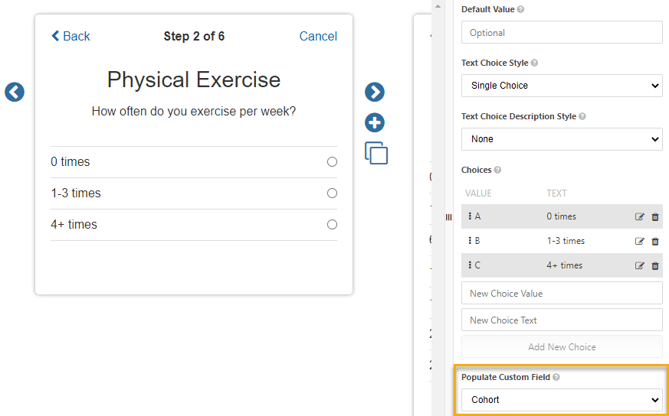
Next, define the survey step in which you will assign the cohort. In this example, participants are placed into a cohort based on their activity level.
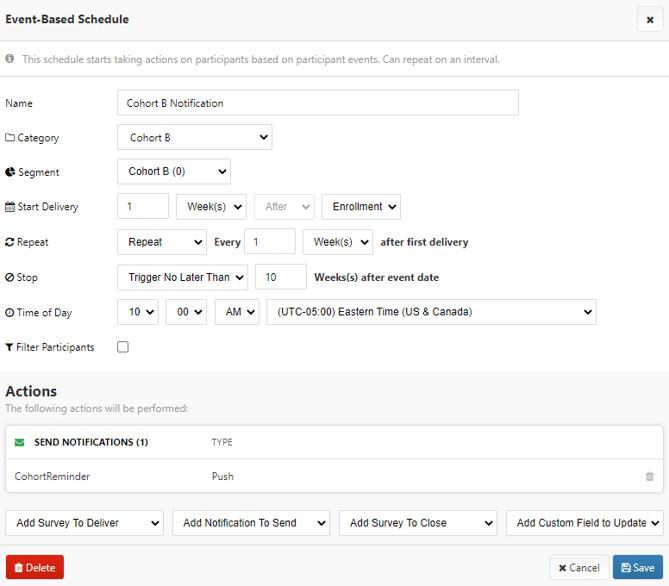
Assuming the notification has already been created, the last step is to schedule the notifications for each cohort. Since cohort A will not receive notifications, start by scheduling notifications for cohort B. Cohort B should start receiving notifications 1 week after Enrollment and continue to receive notifications every week for 10 weeks.
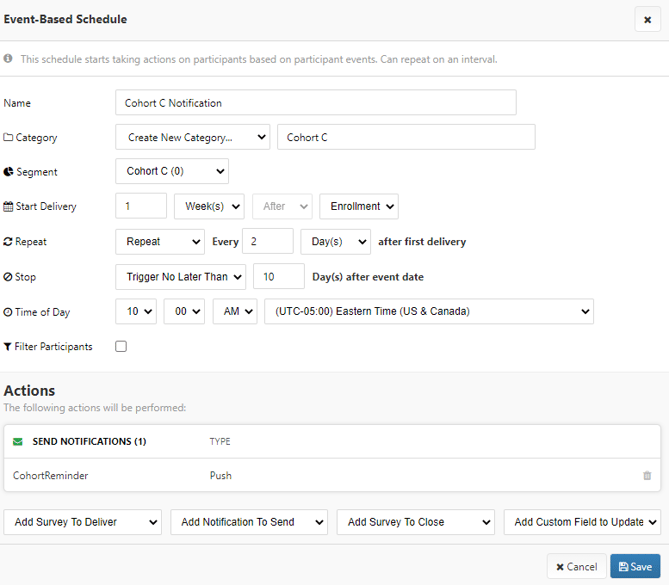
Cohort C should start receiving notifications 1 week after Enrollment and continue to receive notifications every other day for 10 weeks.
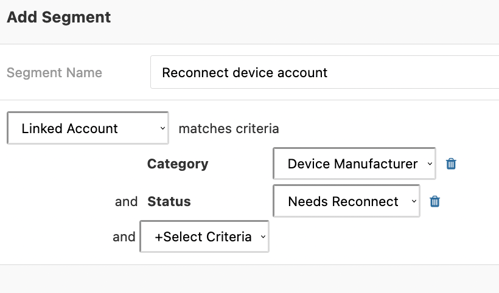
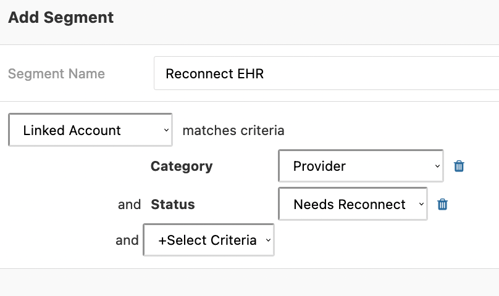
Monitoring Linked Accounts
For studies that collect EHR or Fitbit data, teams often desire to monitor participants' Linked Accounts, determining if any require re-connecting. A simple segment with the following criteria can allow your team to monitor when accounts need to be reconnected.
Device (e.g. Fitbit) reconnect
No Device Data (e.g. Fitbit)

EHR reconnect
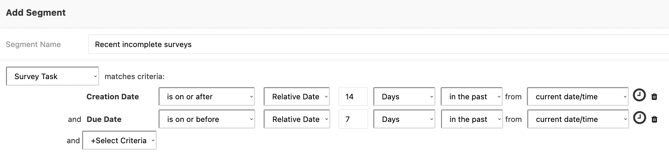
Survey Creation and Due Date Segment
Segments can filter by survey creation and due dates. This can be useful to investigate participants with recently created and delivered surveys, as well as determine which participants have overdue surveys.
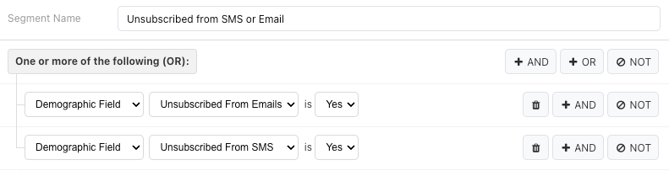
Unsubscribed from SMS and/or Email
Participants may choose to unsubscribe from SMS and/or email notifications. Creating a segment to identify these participants may help to determine which participants may require manual outreach for study-related activities. Try building a segment using the criteria below to identify such participants.
Platform Usage (iOS/Android/Web)
Segments can be used to filter participants based on either the most recent platform they logged into or any platform they've logged into (e.g., a participant might first log into web and then later log into the iOS mobile app). For example, if your project uses active tasks that are only available on iOS, you may want to create a segment for iOS users and limit the survey schedule to only send to that segment.

Segment Actions
Once segments are created, users may take actions on those segments directly in the Participant Management tab. The following options are available:
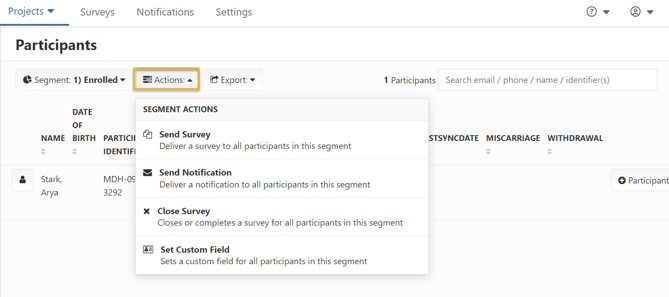
- Send Survey: Deliver a survey to all participants in this segment. Users may send surveys to participants through a segment and block the survey from being accessible based on status of other surveys in the queue via the ""Blocking Survey"" feature. In the example below, a participant in the enrolled segment will receive the prenatal 28 survey in their MyDataHelps account. However, they will not be able to complete it until the demographics survey is completed. This allows teams to ensure surveys are completed in a particular order.

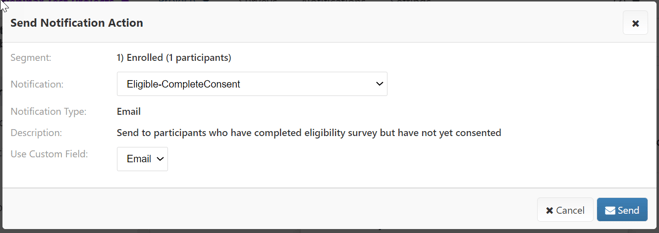
- Send Notification: Deliver a notification to all participants in this segment. In this example, all participants in the Enrolled segment will receive the Eligible-CompleteConsent email notification in the email address that was set as a Custom Field. If you do not have an email Custom Field, the notification will be sent to the participant's MyDataHelps account email.
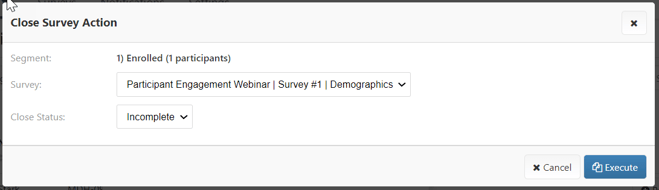
- Close Survey: Closes or completes a survey for all participants in this segment. In the example below, the demographics survey will be closed for all participants in the enrolled segment and that survey will be marked as incomplete in their account.
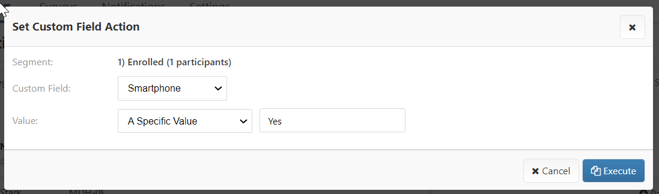
- Set Custom Field: Sets a custom field for all participants in this segment. In the example below, participants in the enrolled segment will all be given a value of ""Yes"" in the Smartphone custom field.