Participant notifications can be configured in a matter of minutes, with available features such as dynamic text replacement (for example, addressing a participant by their first name or confirming their previously-entered surgery date), multi-lingual notifications, and links. See Participant Notifications Overview for general information on notifications and related articles.
Creating Notifications
In general, to create a notification:
- Navigate to the "Notifications" section of MyDataHelps Designer.
- Click "Add Notification" in the top right.
- Select the notification type (push, SMS, or email).
- Complete the necessary fields based on the notification type.
- Click Save & Publish.
Notification Identifiers
All notifications have an internal identifier. This must be unique within your workspace.
It is helpful to develop a consistent naming convention for identifiers before you start creating notifications. Many projects use a format of {Project}-{BriefDescription}-{Type} for their notifications. For example, SLEEP-Recontact-Email. This indicates to the project team that this notification is used for the SLEEP Project, is used for a recontact purpose, and is an email. You may use "ALL" for the project if a notification is shared across all your projects.
If you change an identifier after the delivery triggers have been activated by CareEvolution, the trigger will no longer work and the message will not be sent.
Viewing, Editing, and Deleting Notifications
You can view and edit your custom notifications by going to the "Notifications" section of MyDataHelps Designer (in the top menu bar).
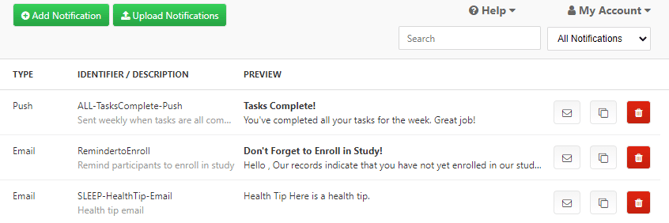
Click on any notification to edit it. Select the trash icon to delete it.
If you have many notifications, you can use the drop-down menu at the top right to switch between showing all notifications or only notifications of a particular type. You can also use the search box to search your notifications.

Copying Notifications
If you have multiple similar notifications, you can copy an existing one as a starting point.
- Click the "Copy" button next to the existing notification.
- The new notification will have the original's identifier, with "_copy" appended. For example, "SLEEP-HealthTip-Email_copy."
- Edit the new notification. Give it a proper identifier, according to your naming convention, and change the other fields as needed.

Be sure to edit every language if you are using multiple languages.
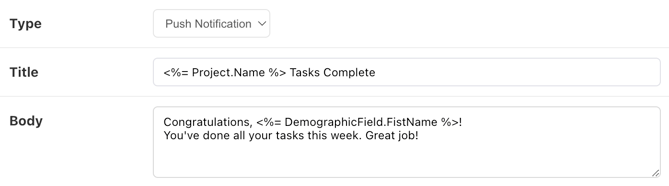
Using Piping in Notifications
Within the title/subject or body of any notification and within email template fields, you can dynamically "pipe" project or participant fields like a participant's demographic information (name, state) or custom fields (if you have defined any). See Piping for more information.
Make sure the custom field has been defined in each project that wishes to use a notification containing that custom field.
Creating Multi-Lingual Notifications
To make a notification available in multiple languages:
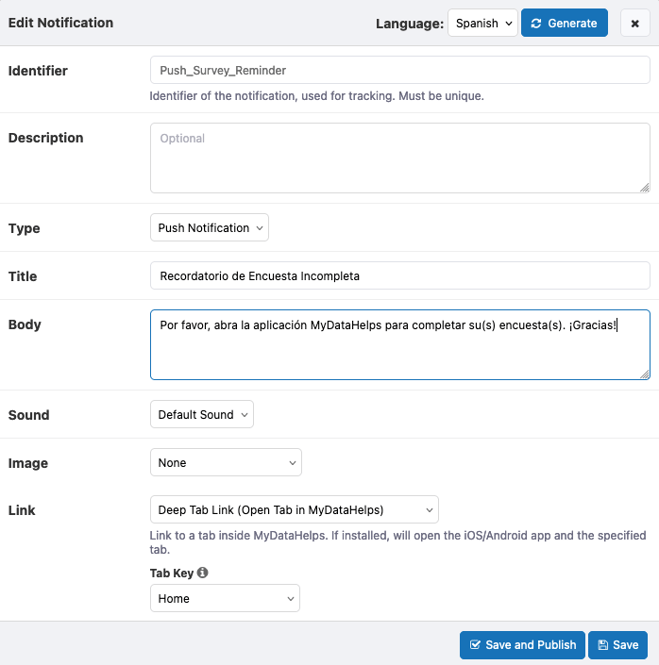
- Select the "Language" menu at the top of the notification and select a language.
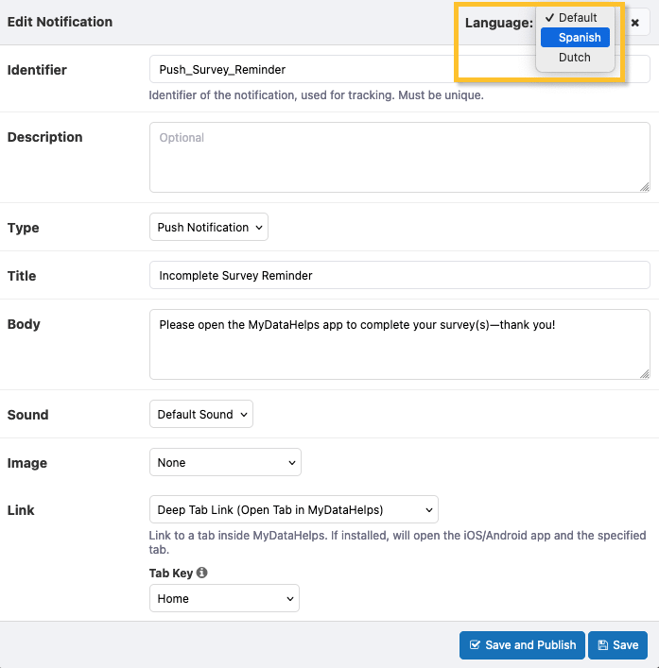
- Either enter the translated text for the notification in that language or select "Generate" to use artificial intelligence (AI) to populate your translated notification strings. The identifier, description and type are the same in all languages.
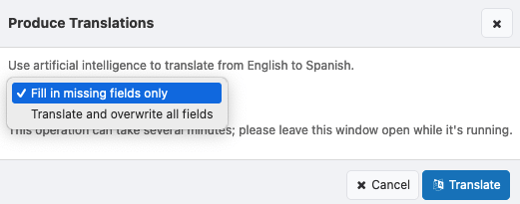
 If you are generating your strings with AI, you have the option to "Fill in missing fields only" or "Translate and overwrite all fields" before clicking Translate and then Apply. You can always re-generate strings if you are updating the notification!