Institutions allow you to separate participants based on their institution, or study site, and assign permissions for MyDataHelps Designer users with responsibilities at specific institutions. For example, you may want coordinators from a certain site to only have access to participants from that site. With Institutions, you don't need to create institution-specific segments (though you can!) as MyDataHelps Designer users will only see participants for their assigned institutions, making it a useful feature for multi-site studies.
Enabling Institutions
You can enable institutions for your project by navigating to the Institutions tab on the left-side project navigation menu, then clicking "Enable Institutions."
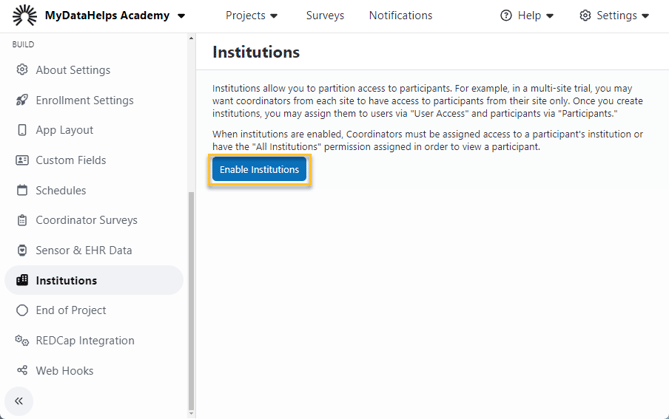
All projects created before March 2024 automatically have Institutions enabled. If you do not wish to use Institutions for your project, you can disable them from this page as well.
Creating and Editing Institutions
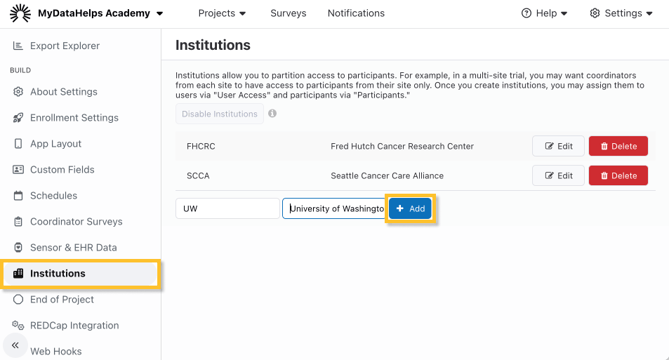
To create an institution for your project, add a unique code for the institution in the “New Institution Code” field and a name for the institution in the “New Institution Name” field. Select “Add” and you will see the new institution saved. You may edit or delete institutions by clicking “Edit” or “Delete” to the right of the institution details. Add as many institutions as needed to run your multi-site study. The Institution Code shows in the participant viewer if that field is selected in the "Column" drop-down.
By default, users have access to all institutions in a project through the "Everyone" team, as described in the User & Permission Management article.
Assigning Users to Institutions
To give specific users access to one or more Institution(s), select Settings from the top of the screen and “User Access” from the list on the left. Select the Institution(s) for that user. Institutions may be selected for both pending and active users.
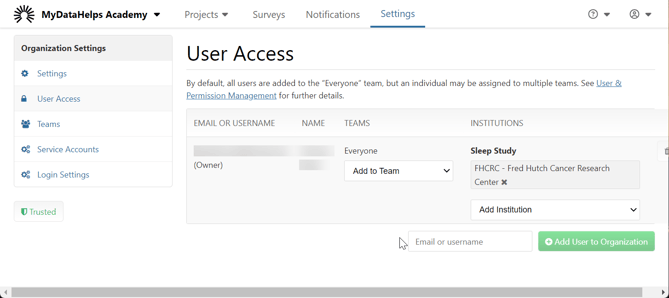
Alternatively, if there are users that should have access to all participants across all Institutions, you can add the "View/Manage Participants in All Institutions" permission to their corresponding Team. See User & Permission Management for more information.
Assigning Participants to Institutions
Participants can be assigned to an institution in a few different ways:
You must have created your Institutions before assigning participants to them. See the above section on Creating and Editing Institutions.
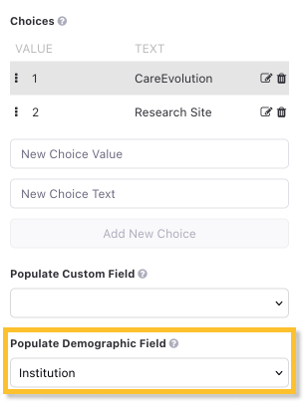
- By Survey: If your survey step can populate a participant field, you can select Institution from the Populate Demographic Field drop-down so that it will be assigned by the survey step. It is important that the step result be the Institution code/value, not the name.
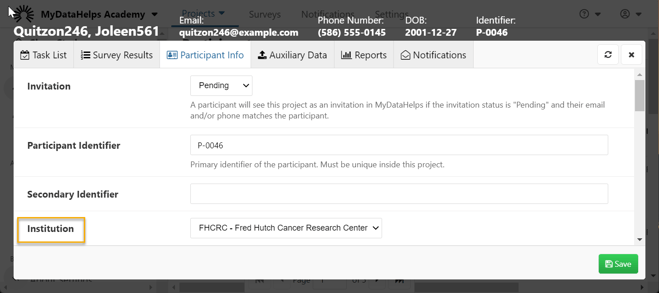
- By Participant Viewer: You can select the Institution drop-down from the Participant Info tab within the Participant Viewer to manually assign the Institution.
- By Invite or Bulk Participant Update: You can also assign the institution during invitation or through a bulk participant update. It is important that you use the Institution code/value, not the name.
Viewing Participants Assigned to Institutions
In order to aid participant management for your project, participants can easily be organized by their Institution assignment using segments. To do so, you will want to create a segment using the Institution criteria type. Once you select this criteria type and add an Institution, only participants assigned to that Institution will appear in the segment.
