Unlike other custom fields, a picklist custom field can only have certain pre-specified values, but it can also be used in unique ways.
Specifying picklist values
You can create a custom picklist field from the Custom Fields project tab. After adding a Custom Field Name and optionally a description, you'll then have the option to change the custom field type to picklist from the drop-down. Refer to Types of Participant Fields for further details.
After selecting Picklist, you'll have a row added below to add a picklist option. The option value is the value coded if that option is selected for a participant, while the option display name is the user-friendly name for the option. Once you have your value and display name, click the + icon to add the option. Continue to do this until you have all your values and options. As with all custom fields, you can also choose to make this field Coordinator Editable and/or Participant Editable. Once you have added all options and selected your settings, click Save Custom Field Settings.

Viewing and using picklists
You can use picklists similar to other custom participant fields (refer to Using Participant Fields), but they have some additional functionality.
Participant & segment lists
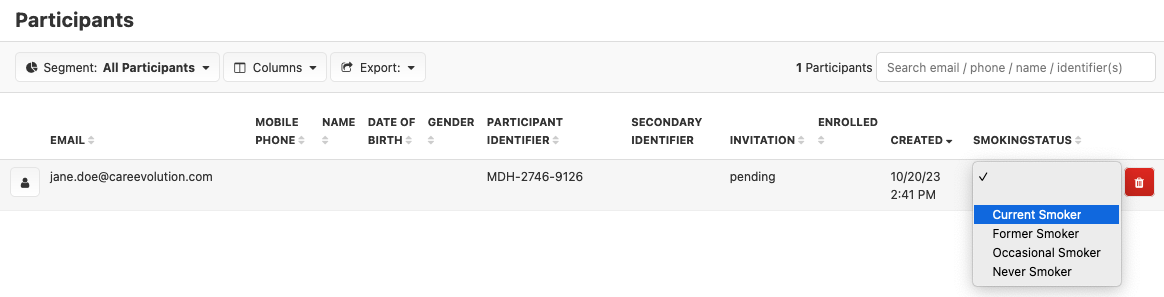
From the All Participants view or any of your segments, you can adjust the view to include your custom picklist field.
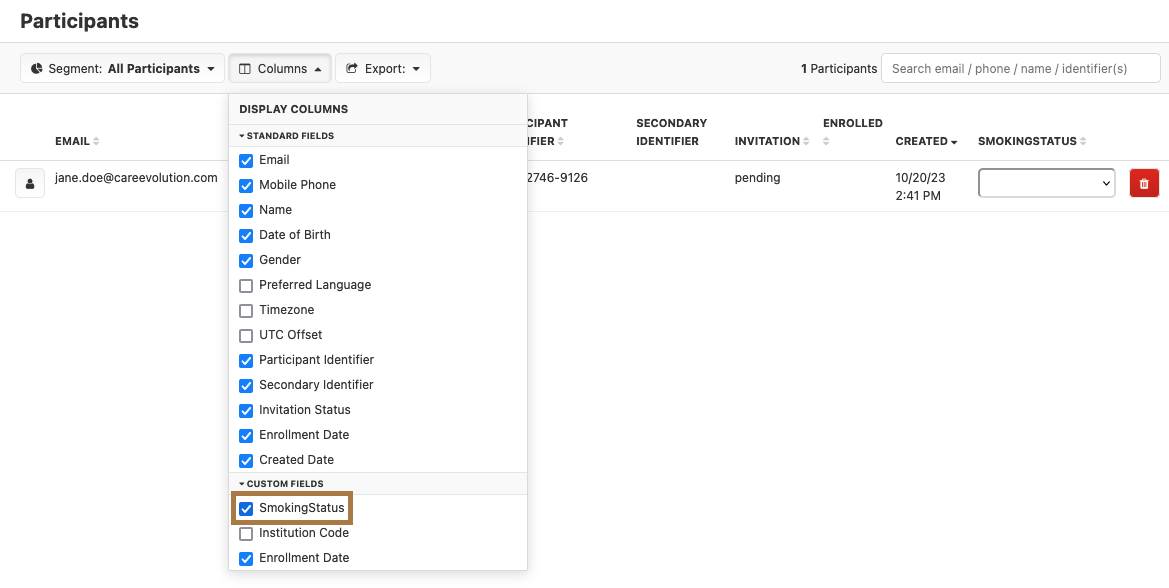
With your custom picklist field added to your list view, if the field is marked "Coordinator Editable", you can quickly edit the value by selecting from the drop-down.
This can be especially handy for participant trackers, where you might be updating a participant's status (e.g., a BiospecimenKitStatus field with the value "Returned").
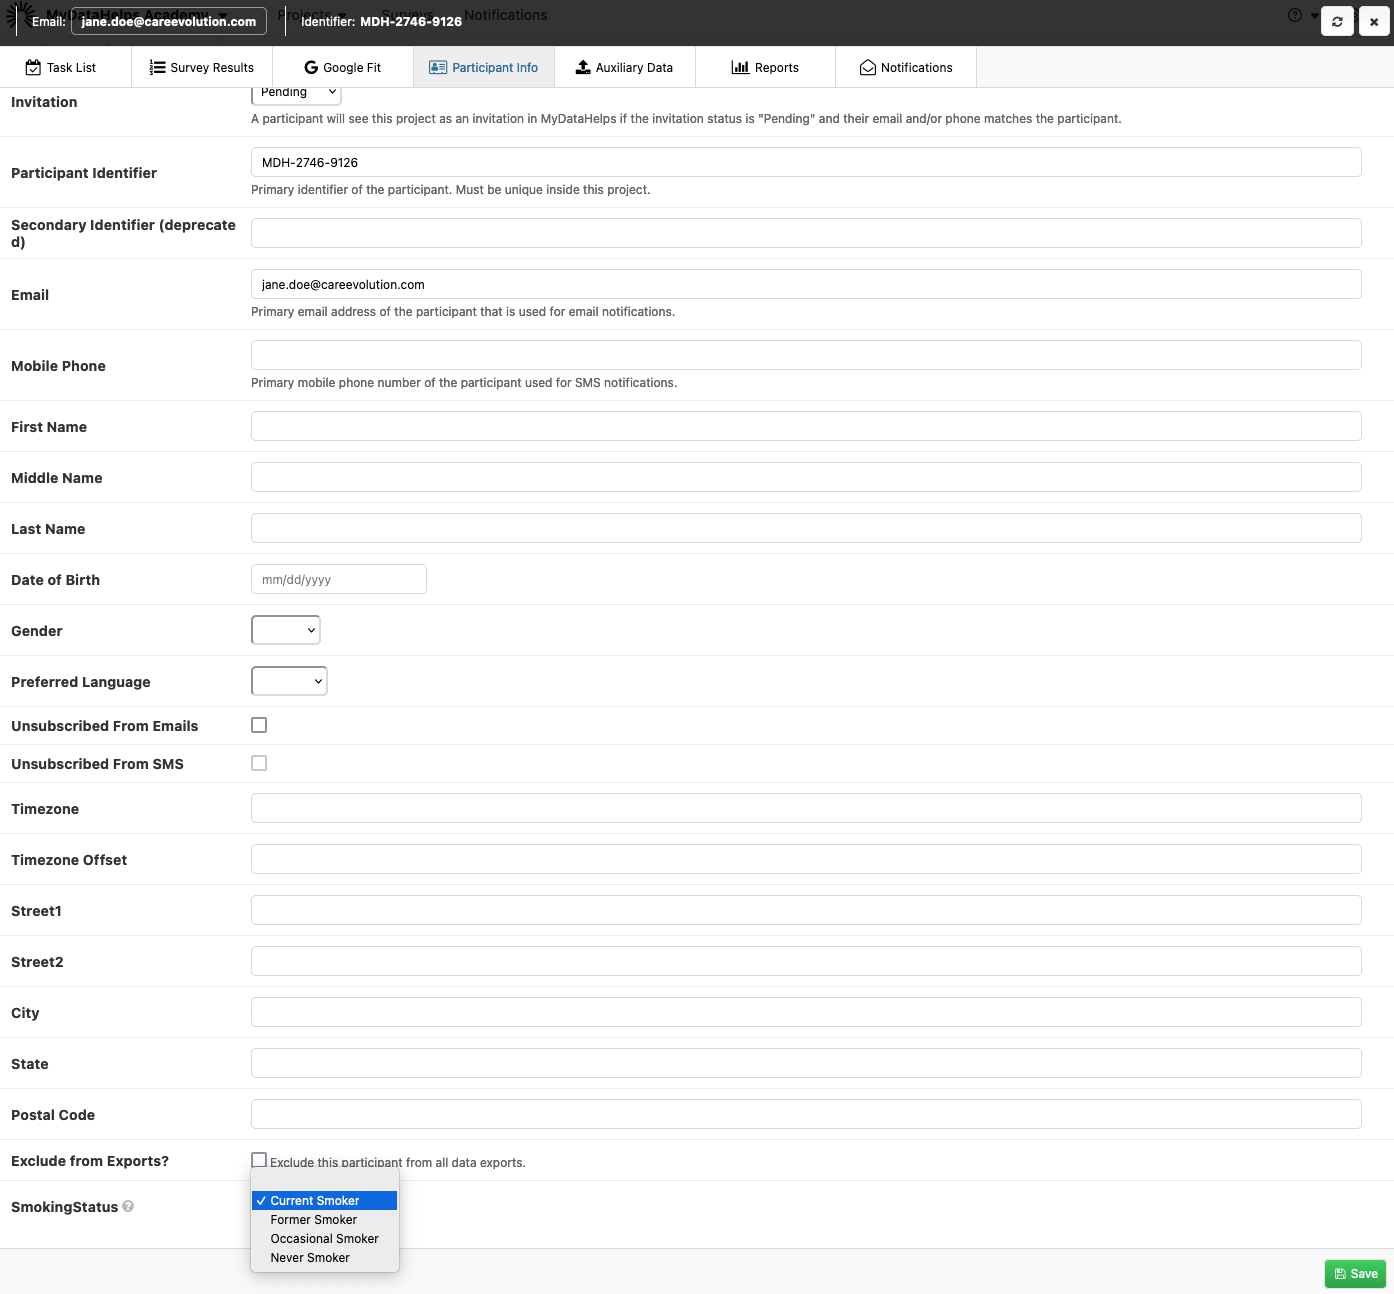
Participant Info tab
Similar to updating the custom picklist field from a list view, you can also navigate to the Participant Info tab within the participant viewer. If the field is "Coordinator Editable", you can update the value.