The Symptom Shark View Builder components enables your participants to keep a customizable log of their symptoms and treatments. This log has a calendar view and can be shared, such as displaying it to your health care provider.
Follow this guide to set up the Symptom Shark components for your project.
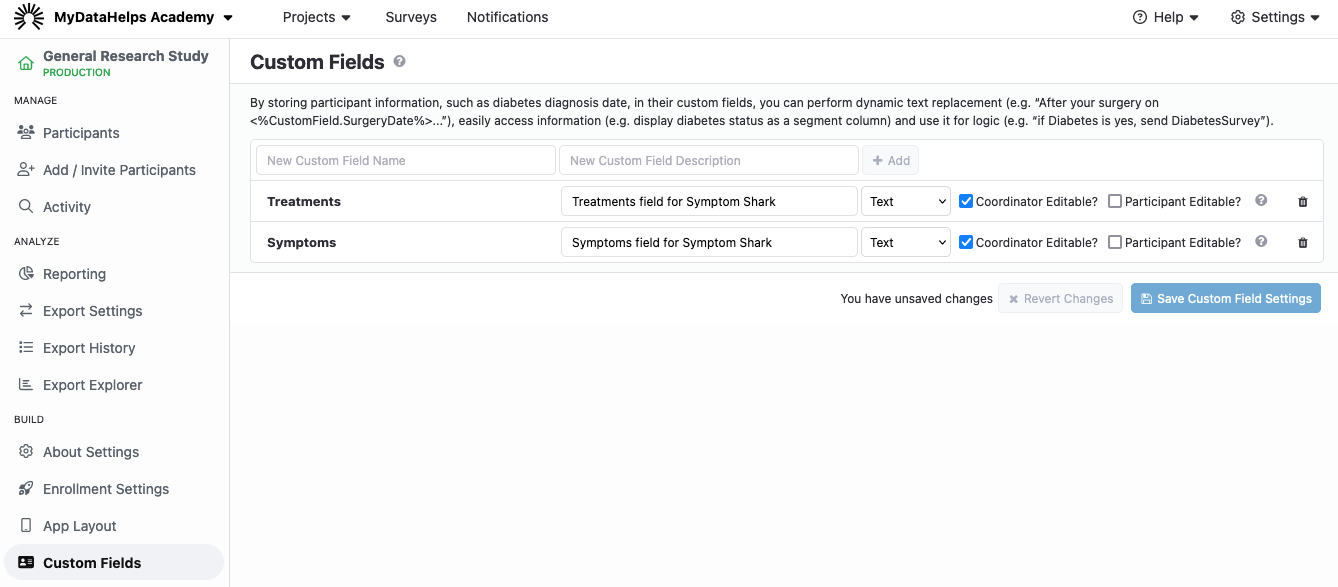
Step 1: Add Symptom & Treatment Custom Fields
Symptom Shark relies on Symptoms and Treatments custom fields to work. All of the different Symptoms and Treatments a participant tracks will be stored as a text string in these custom fields.
Go to your project, select "Custom Fields" in the left pane, and add a Symptoms custom field and a Treatments custom field, both of which should have the "Text" type.
Step 2: Import the Symptom Shark Surveys
In the MyDataHelps Survey Library, import the following surveys under the "Other" category:
- SetupSymptomLog
- UpdateSymptoms
- UpdateTreatments
These surveys are used for the initial setup of the participant's symptoms and treatments, as well as updating the symptoms and treatments. Once added, be sure you Publish the surveys to your project.
You may customize which symptoms and treatments are pre-populated during the initial setup:
- Open the "SetupSymptomLog" survey and select the step you want to pre-populate data onto, e.g. "Symptoms".
- Select the "App Url"
- Append a query string at the end such as ?items=Fatigue,Pain,Nausea (using the symptoms or treatments you would like to pre-populate)
For example: https://symptomshark.org/app/symptom-setup-standalone.html?items=Fatigue,Pain,Nausea
You may also choose to move the setup steps into a different survey as is appropriate for your project.
Step 3: Incorporate Symptom Shark View Builder Components into Your Views
Finally, in order for participants to interact with Symptom Shark, you must incorporate the components into your app design. Below are the various ways you might accomplish this.
Home View
There is an example Home view template called "Personalized Home Screen + Symptom Shark". This view contains a call to action for setting up the symptom log as well as embeds the "Log Today" component so the participant has quick and easy access to logging their symptoms on a daily basis.
Calendar View
There is an example Calendar view template called "Symptom Shark Calendar". It's important to note that the calendar, histograms, and overall experience chart must be embedded inside a "Symptom Shark Visualization Coordinator" which provides them the data they need to function, such as navigating by date. The example view has this already configured.
Report Builder View
An important part of Symptom Shark is the ability to generate PDF reports of symptoms and treatments. There is a "Report Builder" component which can be incorporated where convenient into your project's views. There is an template view, "Symptom Shark Report Builder", which includes this.
Updating Symptoms and Treatments
Your participants will need to be able to update their symptoms and treatments. Typically this may be on a "More" tab, "Settings" tab, or a feature you want to include in your home screen. To make changes, they will need to complete the “UpdateSymptoms” or “UpdateTreatments” surveys that you added to your workspace and published to your project. To add components to your view(s) that can update symptoms and treatments:
- Add the “Action” and “Button” component from the Basic Building Blocks to your view and select “Start Survey” as the Action.
- Enter in the survey’s name (“UpdateSymptoms” or “UpdateTreatments”, unless you changed them).
- Be sure to configure the rest of the component’s fields and to add a component for both updating symptoms and updating treatments.
We recommend thorough testing of the Symptom Shark experience!
Step 4: Enable Symptom Shark Exports
Symptom Shark has a handful of specific exports. If you are using Symptom Shark, enable the following exports to receive the data:
- SymptomSharkDailyOverallExperience
- SymptomSharkSymptomLogs
- SymptomSharkTreatmentLogs