Creating and Renaming a Project
Creating a Project
When you create a workspace you will automatically be prompted to create a project. If wish to create another project within your workspace, simply go to the projects menu in the top navigation bar and click New Project.

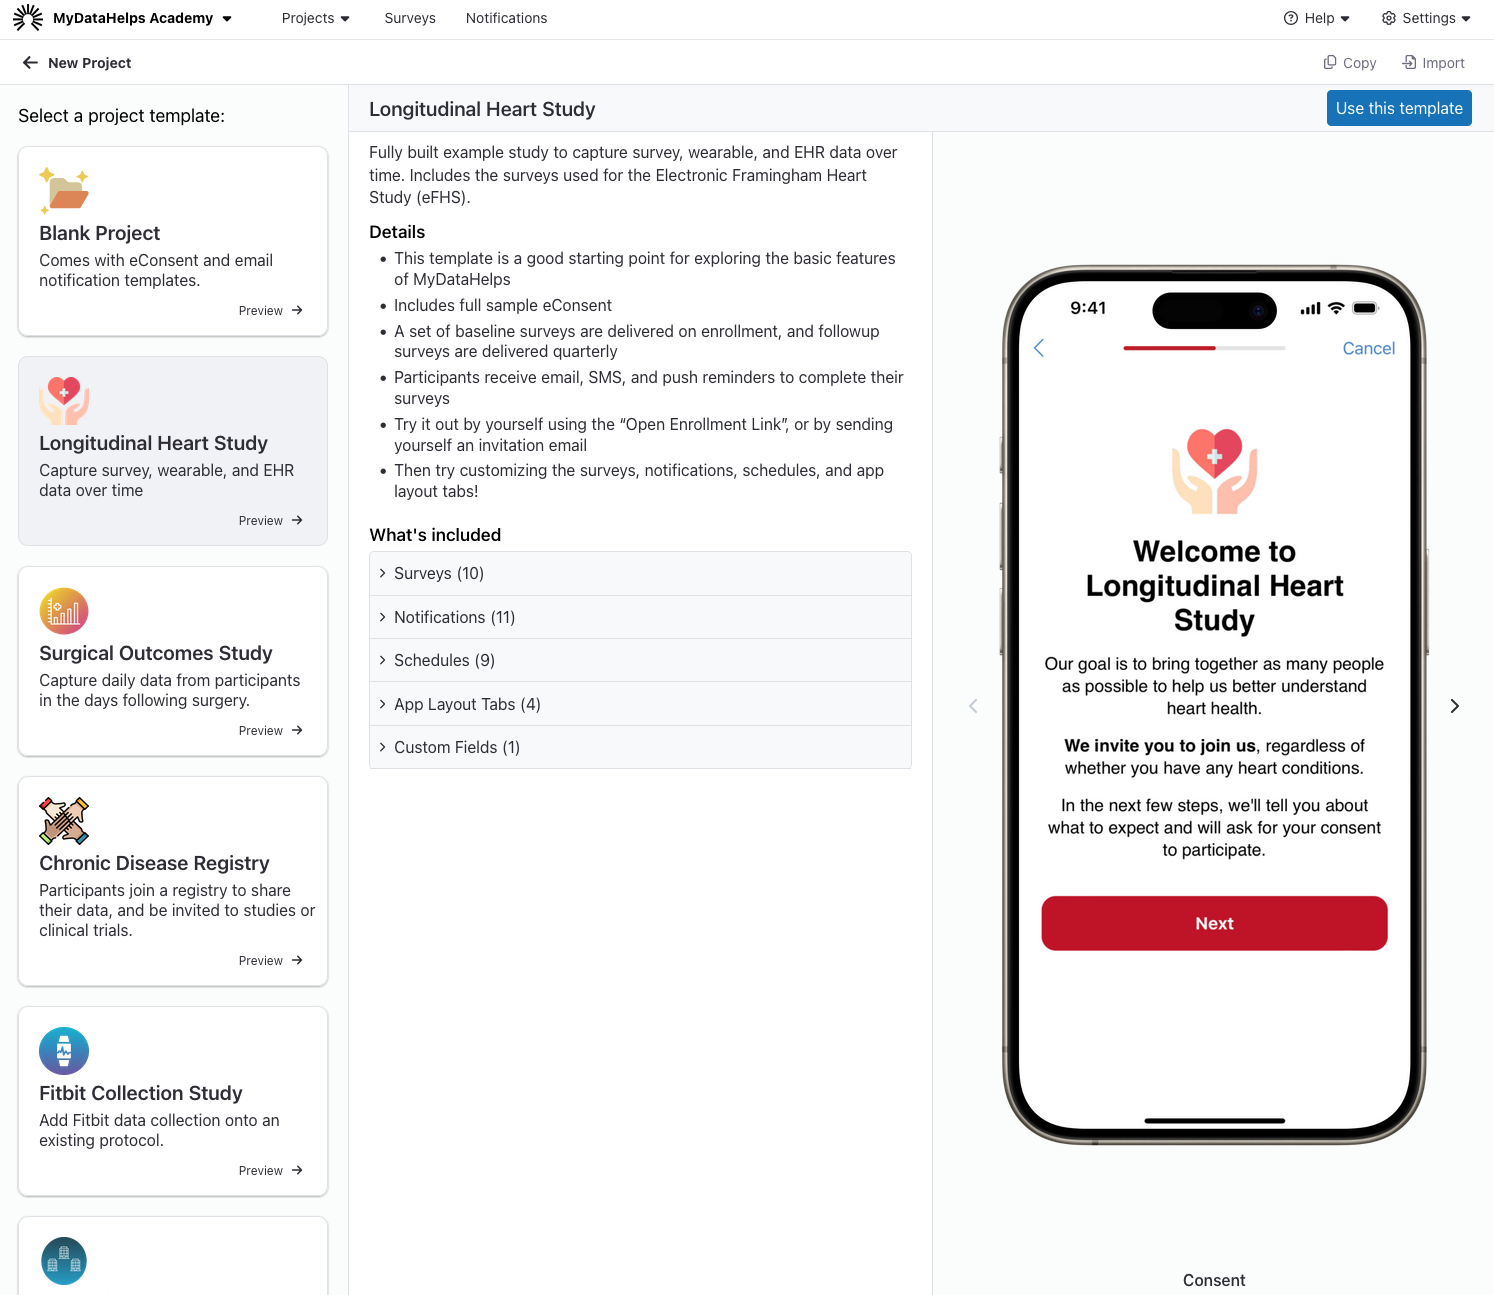
When creating a project, you'll need to choose a template. Templates quickly allow you to jumpstart your project configuration by including standard surveys, notifications, schedules, app layout tabs, and custom fields. If you'd like to start from scratch, you can select the "Blank Project" template option.

When you've found the template you'd like to use, click "Use this template" and enter a project name.

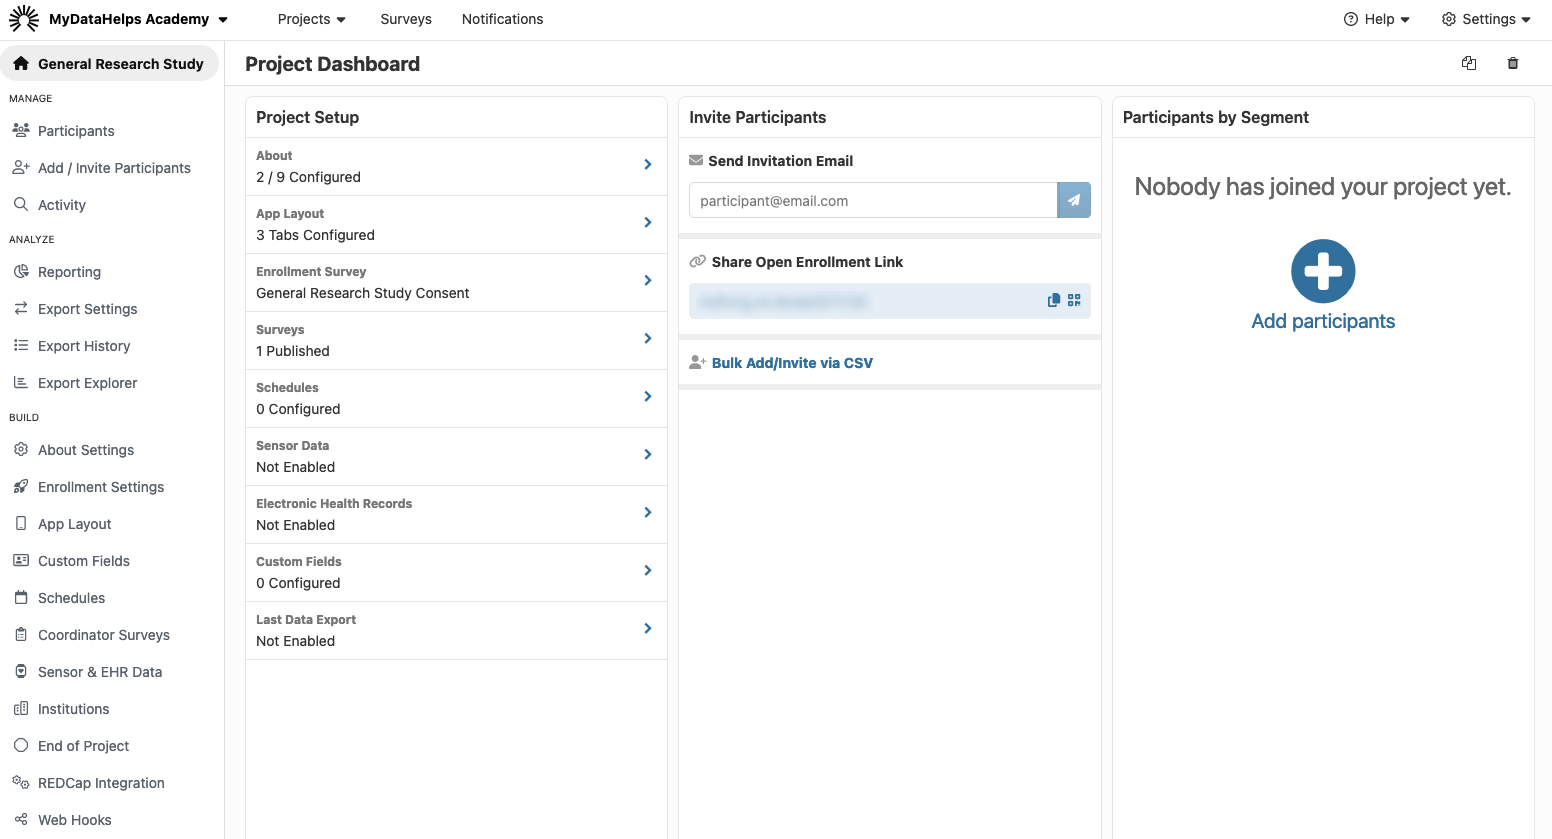
Upon creation, you will be taken to the project dashboard, where you can navigate to various project settings, try out your project, or add participants and segments. 
Renaming a Project
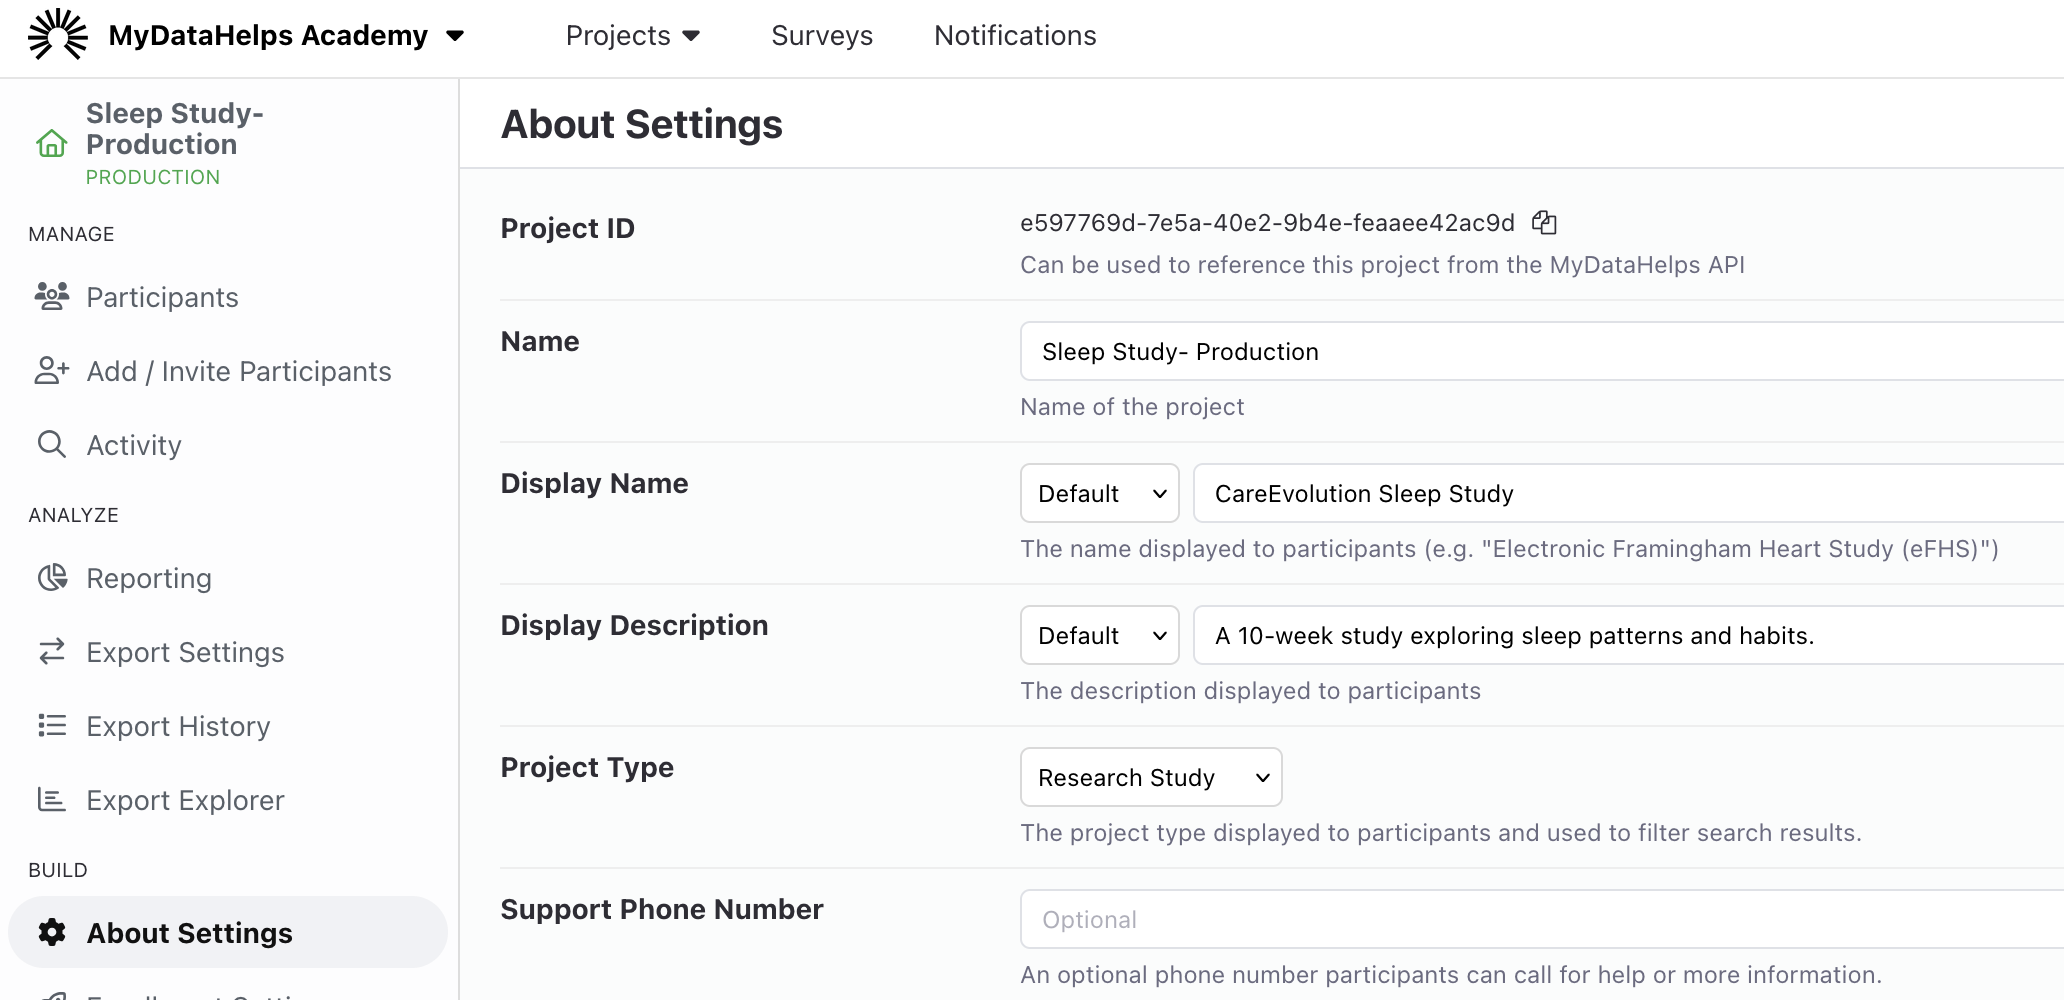
Once you have created a project, you are able to rename the project. To do so, you will need to navigate to the About Settings tab on the sidebar.
On the About Settings tab, the project can be renamed by editing "Name". This is an internal name for your project. If you wish to change the participant-facing project name, edit the "Display Name".
