Each project requires an enrollment survey to be configured before participants can join. Unlike standard surveys, participants are prompted to complete the enrollment survey immediately upon creating their MyDataHelps account. This is the final step in completing enrollment in the project. Typically, projects will include eConsent as part of their enrollment survey, which the default sample enrollment survey does. However, this can be modified or changed as needed.
Your consent should describe the terms and conditions of your project. Typical sections include:
- Overview
- Data Gathering
- Privacy
- Data Use
- Time Commitment
- Study Survey
- Study Tasks
- Withdrawing
Creating an Enrollment Survey
By default, an enrollment survey will be added when you create a project, which will include eConsent. However, you should update it to fit your project needs or you can create an enrollment survey from scratch, same as creating a standard survey. You can also deliver an eConsent survey separately from the enrollment survey.
Adding eConsent
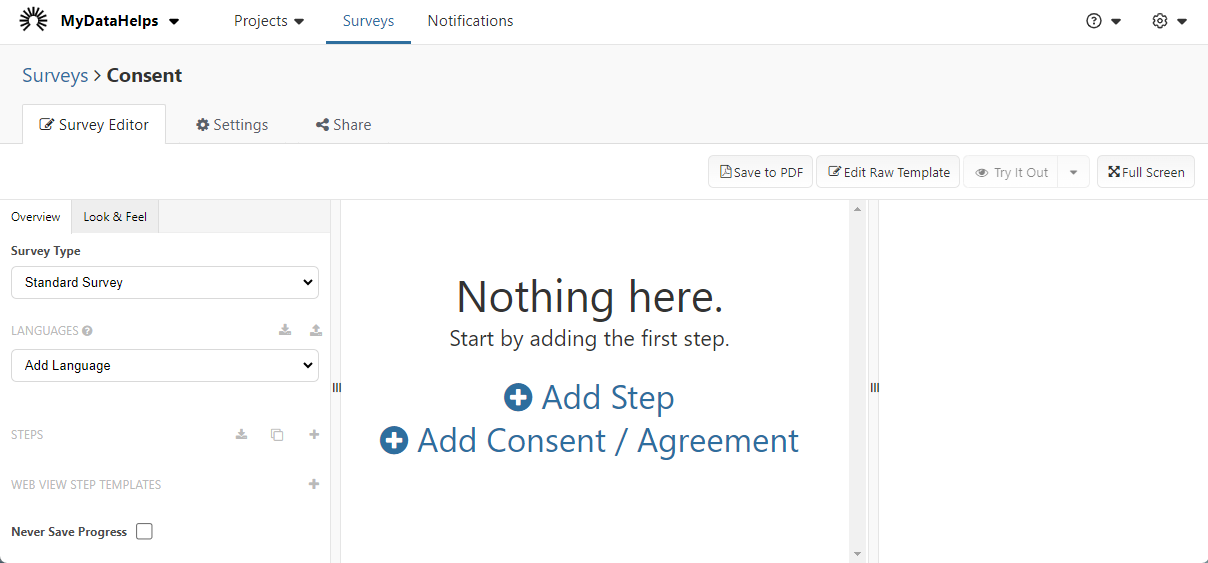
If you choose to create a consent survey from scratch, you will arrive at the following page. Start by clicking "Add Consent / Agreement".
Consent Steps
By default, Welcome and Consent steps will be added to your consent. You might consider adding other steps as needed. For example, you may add an instruction step or an eligibility question step with validation rules to prevent a participant from joining your project unless they state that they meet the necessary criteria. While you may have many Step Types in your consent survey, the rest of this article will focus on the Consent Step Type, but you may also want to consider the Consent Form Step Type if you need multiple signatures or questions captured as part of consent.
Consent Step Type Properties
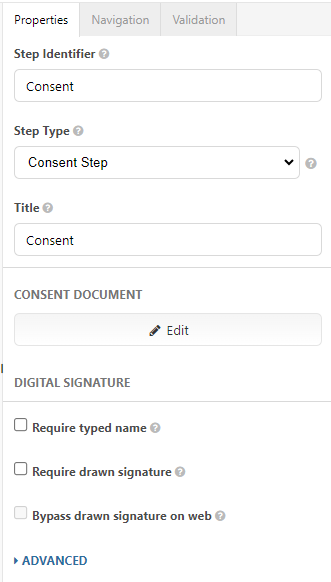
Once you navigate to the Consent step, your right pane will present consent properties to edit.
- Step Identifier: Already populated as "Consent" and is used as an internal way to reference this step. You may revise the name.
- Step Type: Leave this as Consent Step - otherwise you will not be able to add your consent content here! If you are using the legacy consent step types (visual consent step and consent review step), please refer to the legacy consent article.
- Title: This will be the title at the very top of the page. You can leave it as "Consent" or rename it after the study, e.g., "Sleep Study Consent."
- Consent Document: This will be the consent document presented to the participant. Click the Edit button to open the Consent Editor. From here, you can type or paste your consent content in and then click Done in the upper right corner to save your changes.
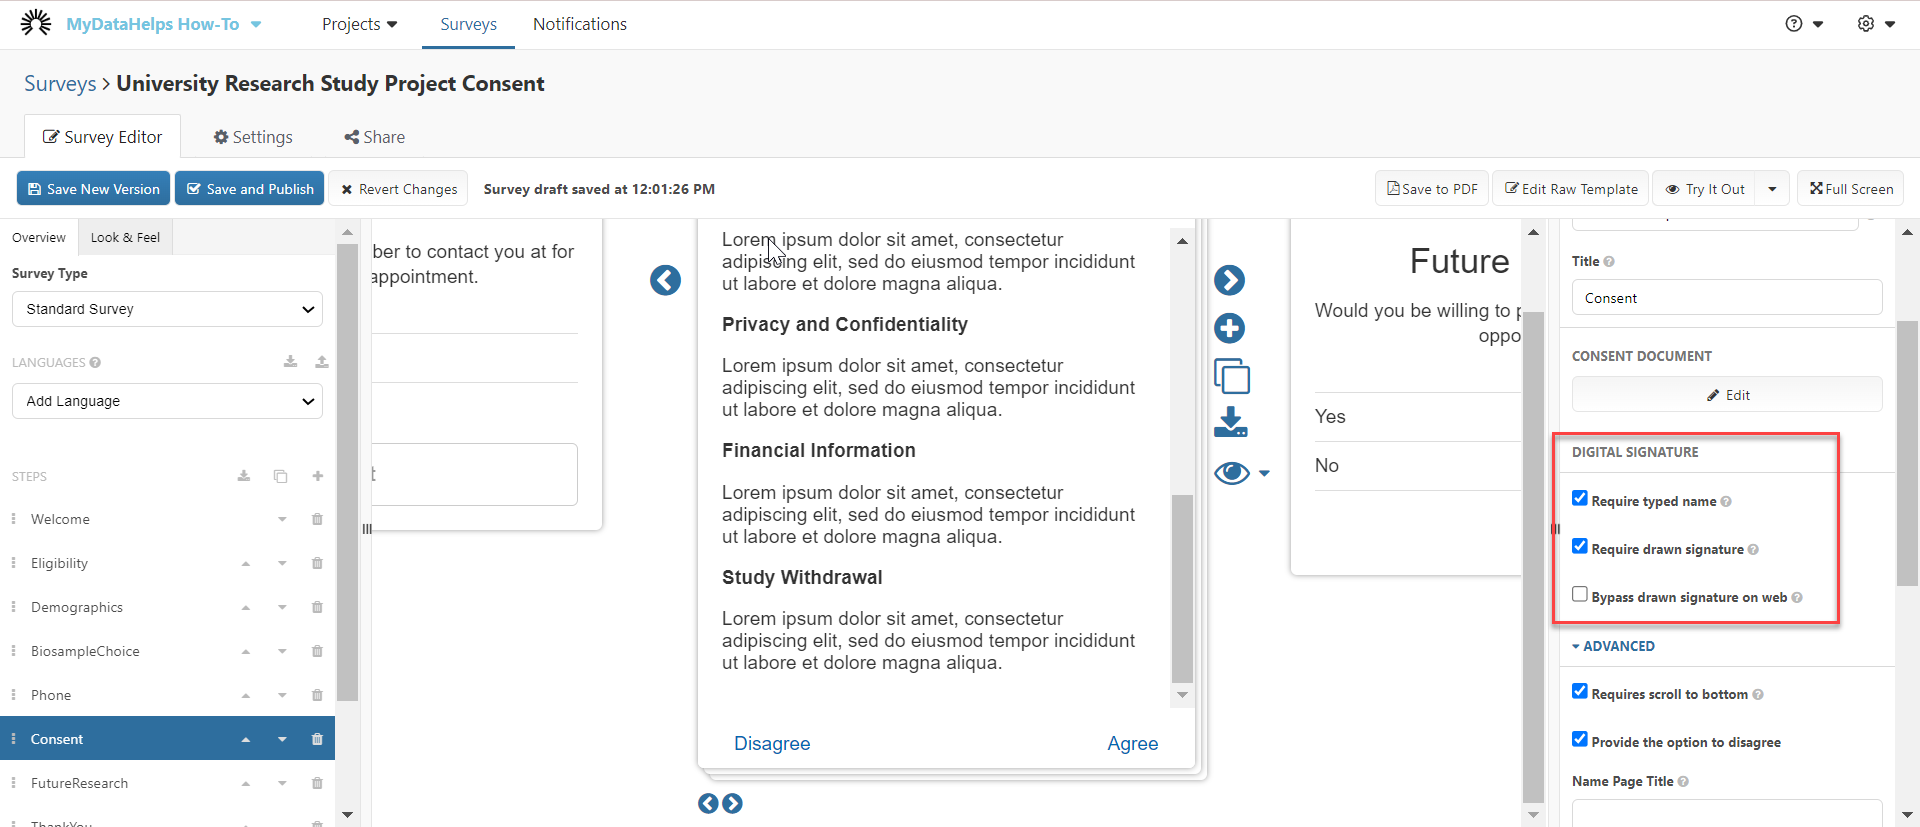
- Digital Signature: This section details options around signing of the eConsent. As you enable these check boxes, you can view them using the left and right arrows underneath the step viewer.
-
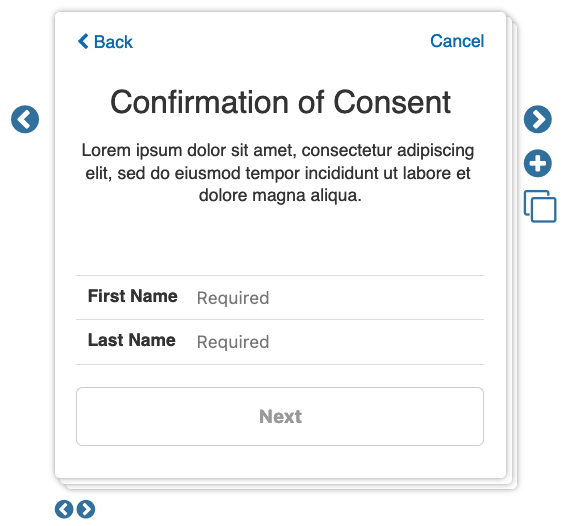
- Required typed name: If enabled, participants will be required to input their first and last name.
- Require drawn signature: If enabled, participants will be required to electronically sign the consent by drawing their signature on their device.
- Bypass drawn signature on web: If enabled, participants who are accessing the consent via web, rather than the mobile app, will not be required to electronically sign the consent survey.
- Advanced:
- Requires scroll to the bottom: If enabled, participants will be required to scroll to the bottom of the consent before they can continue.
- Provide the option to disagree: Allows the participant to disagree to consent. Best practice is to leave the Disagree button disabled and force participants to exit out of the survey if they don't wish to consent and join your project.
-
- Name Page Title: If the "Required typed name" field is enabled, you can elect to provide a custom title for the screen where they would enter their name.
- Name Page Text: If the "Required typed name" field is enabled, you can elect to provide custom text for the screen where they would enter their name.
- PDF Signature Page Title: You can elect to have a custom page title displayed on the signature page when exporting completed consent surveys.
- PDF Signature Page Content: You can elect to have custom text displayed on the signature page when exporting completed consent surveys.
- PDF Signature Title: You can elect to have a custom signature title displayed on the signature page when exporting completed consent surveys.
- Consent PDF Email Notification: You can elect to have participants receive a PDF copy of the consent using one of your published email notifications.

Sending Participants a Copy of Their Signed Consent
You can elect to send participants a pdf copy of their signed consent immediately after they complete the survey. To configure this, you'll need to create and publish an email notification, then add that notification to the consent step (under the Advanced settings - see previous section for more details) within your survey.
We recommend using the Informational V2 email template for this purpose, as this can serve as confirmation to the participant that they've completed consent. Once you've published the notification and added it to your consent survey step (and published the updated survey), the configuration is complete. You do not need to attach anything to the email notification or create additional schedules.
Saving Enrollment Survey Progress
When participants save their progress in an enrollment survey and return later, they are given the choice to continue where they left off or start over. This could allow them to re-read consent information or other details about the study. See Creating a Survey for more on saving survey progress for participants.

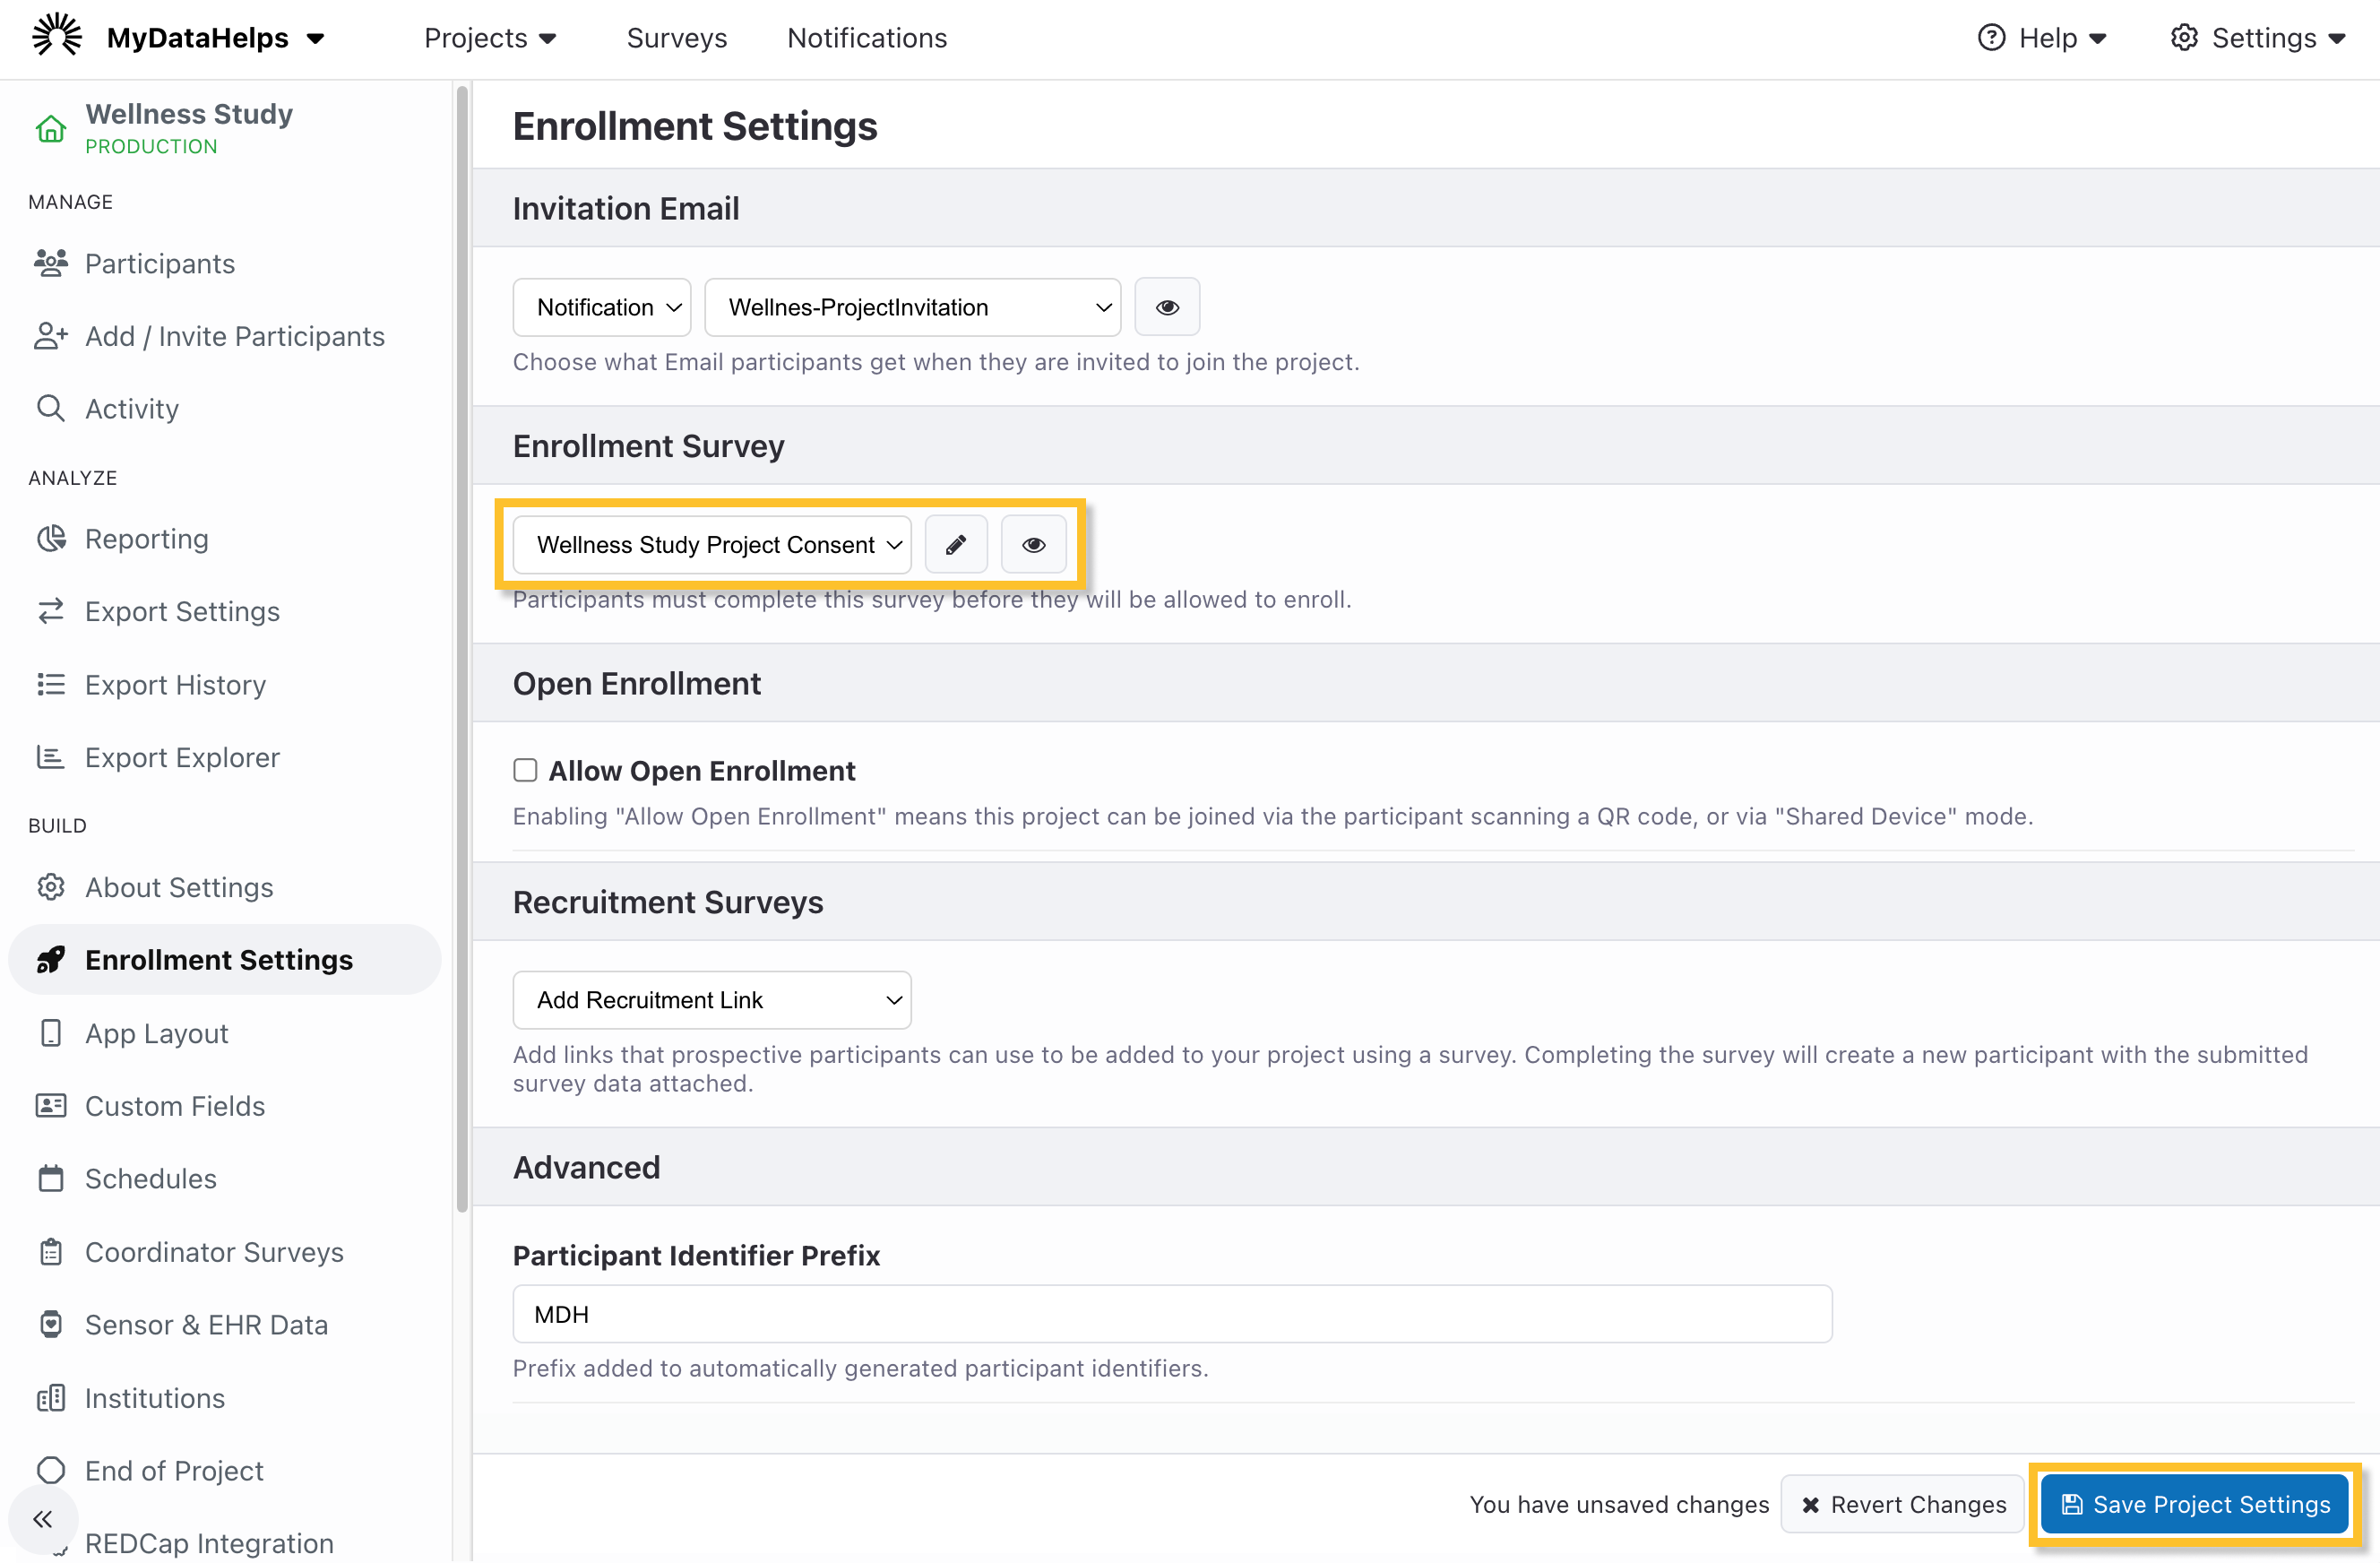
Updating the Enrollment Survey to the Project
Finally, once you have published your consent survey, navigate to the Enrollment tab of the project settings screen and select it as your enrollment survey if desired. Click Save at the bottom of the settings page to save your changes.
FDA Regulated Study Requirements for eConsent
If your study is regulated by the Federal Drug Administration (FDA), you will need to configure the eConsent in such a way that it is compliant with the 21 CFR Part 11 regulation.
FDA 21 CFR Part 11 requirements cover not only the technical capabilities of an application, but also the organizational processes and procedures surrounding its use. The recommendations below are best practices, but it is ultimately the organization's responsibility to validate compliance with all Part 11 requirements.
Regulation Overview
As paper-based activities started to digitize, the FDA recognized that they needed to adjust regulations to be more inclusive of electronic-based procedures. The 21 CFR Part 11 regulation was developed in 1997 to ensure electronic records and signatures align with paper-based signatures for activities that are under the purview of the FDA. The regulation applies to a variety of organizations, including pharmaceutical and biotechnology companies, medical device manufacturers, and the food/beverage industry.
If your project involves evaluating the efficacy or effectiveness of a drug or food/beverage on health, you may be subject to FDA regulations.
Part 11 Compliance Requirements
We recommend that all projects evaluate FDA's Part 11 Compliance Requirements if your project engages or thinks they might engage in activities related to FDA-regulated products.
Consent Set-Up
MyDataHelps supports FDA compliance. We recommend setting up your consent in the following way to gather data needed for Part 11:
- Select the "Consent Step" step type to use compliance-related fields.
- In the "Digital Signature" section of the consent builder, select the "Require typed name" and "Require drawn signature" checkboxes. Unselect the "Bypass drawn signature on web" checkbox.
- If you want to include any additional information, add a form step prior to the signature with additional fields.