In addition to acquiring survey and other export data, you may wish to view more detailed information about individual survey participants or edit certain participant fields. This can be done via the Participants tab.
Viewing a Summary of Participants
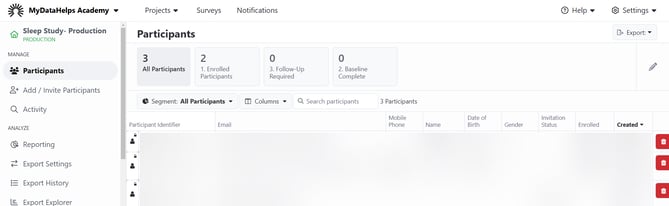
To see a summary of all participants, navigate to your project and go to the "Participants" tab. On this screen, you can filter participants by segment and perform bulk actions, search for specific participants, update the columns displayed, and export the data to a CSV file. For more information on the Participant List, see Managing Participants.
Viewing Participant Details
From the Participants tab, clicking in a row will open the corresponding participant's record. This can include (but is not limited to) the following information:
- A summary of what tasks have been assigned to that participant, and whether or not the task was completed.
- Detailed results of every survey that participant has completed.
- Any sensor or location data collected for that participant.
Unless otherwise noted, timestamps within the participant's record are displayed in your time zone, not the participant's.
Editing the Information Available
The tabs that display at the top of the record are set at the project-level. To edit these tabs, you must have the "Project Builder" permission. Viewing participant details tabs within the Participant Record requires either the "View All Participant Detail Tabs" or the "View Participant Detail Tabs" user permission. If a tab is removed by a project builder, it will no longer be visible to any users of the project.
To update which tabs are visible, open a Participant Record, then select the edit icon on the far right.
From there, you can add tabs, remove tabs, or rearrange existing tabs. By default, the following tabs are enabled for all new projects.
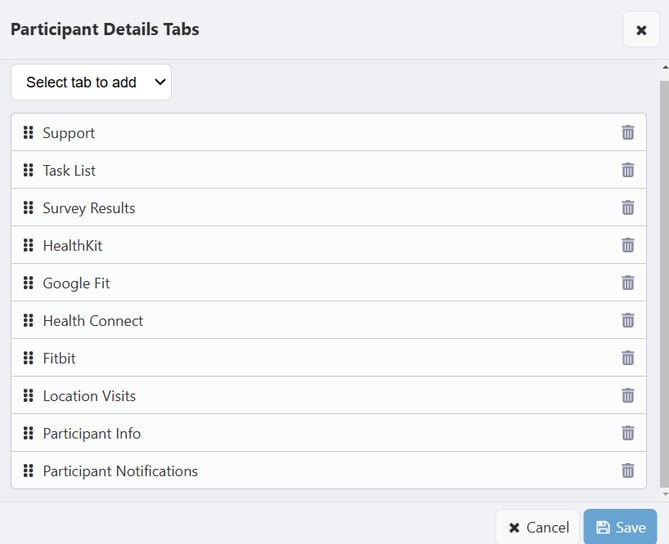
If you configure the participant record to show 0 Participant Details Tabs, then users who do not have the Project Builder permission will not be able to click on or open the participant's record.
The following sections will cover what each of these tabs include.
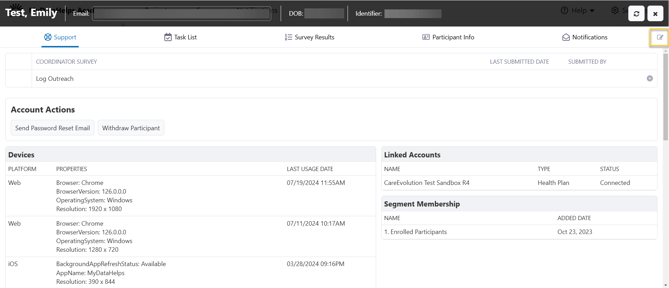
Support
The Support tab offers a snapshot of the participant, including device information for previous logins, linked accounts (e.g., connected ERH account), and segment membership. Additionally, if coordinator surveys are enabled for the project, they can be completed and viewed here. Lastly, the study team can perform account actions for the participant from this page, such as sending a password reset notification.
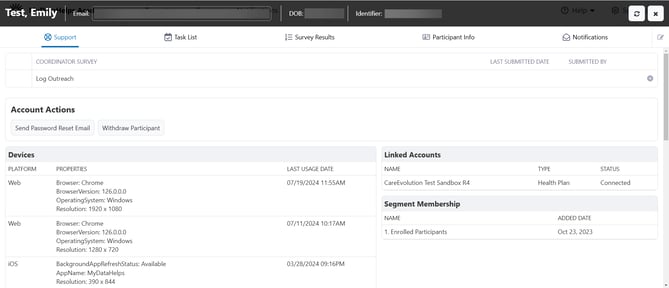
This tab is recommended for all projects.
Task List
The Task List shows a list of all survey tasks that have been delivered to the participant, along with the corresponding schedule that delivered the task (if applicable), the due date, created date, status, and completion date.
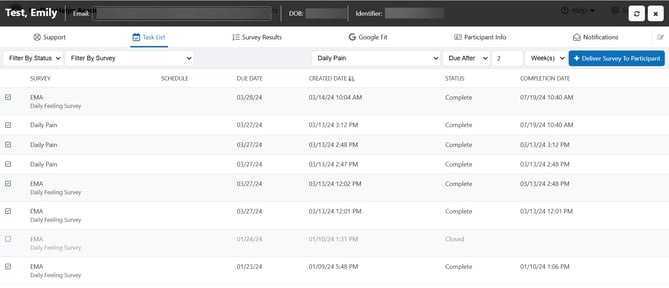
Additionally, coordinators can use this page to manually send a survey task to a participant if needed. This tab is recommended for projects utilizing surveys, as it provides a good snapshot of all complete and incomplete survey tasks.
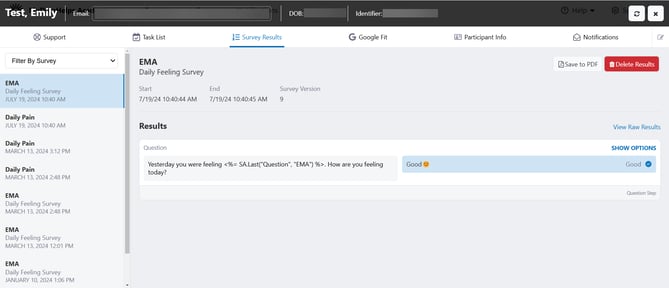
Survey Results
The Survey Results tab shows all submitted surveys for a participant. Clicking on a survey from the left hand side will display the results on the page. From there, you can also view the start and end time, as well as the survey version completed. Results can be saved to a pdf from this page, and if the survey allows for result deletion, results can be deleted from this page.
Sensor Data
There are several types of sensor data tabs available:
- HealthKit (Apple Health data)
- Fitbit
- Google Fit
- Health Connect
- Location Visits
Within each tab, if a participant has data for the specified data type, you can filter on date range and drill into specific data types.
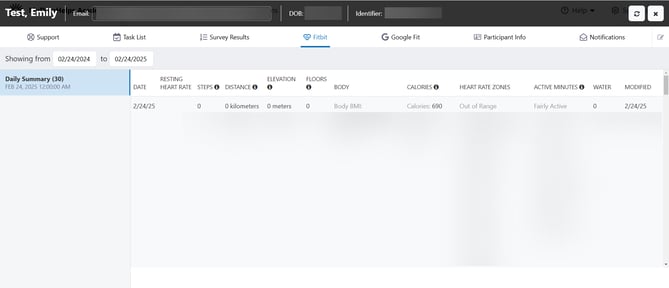
Sensor and location data will only appear if it's configured for this project and the participant has elected to share that data. If data is not appearing, have the participant check their app permissions.
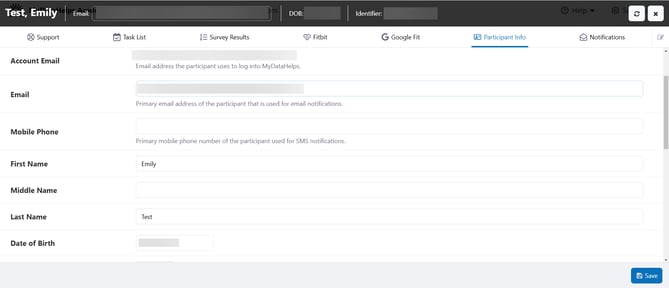
Participant Info
The Participant Info tab contains all participant fields and their corresponding values. Some of these can be edited from this screen, while others cannot - the following sections go over this in more detail.
This tab can be especially helpful in a Dry Run or test project, when you may be testing different scenarios and need to quickly update different custom field values.
Editing Demographic Information
You can edit basic demographic information, such as contact email or phone (see note below - this only applies to the address or number they'll receive notifications at), name, DOB, and address. Once you've updated the corresponding fields, click Save in the bottom right corner.
You cannot edit a participant's MyDataHelps account email once they've joined the project. If a participant needs to change their account email, see Changing a Participant's Account Email. If you update their notification email and/or phone number, all notifications will go to that new notification email and/or phone number and will no longer go to their account email or phone number.
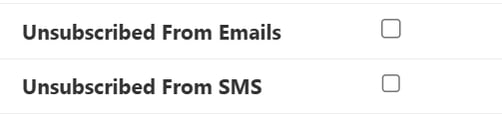
Unsubscribing from Emails & SMS Notifications
Participants can unsubscribe themselves via email or SMS through the standard routes (i.e., clicking unsubscribe or replying STOP); however, this can also be updated from the "Participant Info" tab by checking the "Unsubscribed From Emails" and/or "Unsubscribed from SMS" checkboxes, then clicking Save in the bottom right corner.
Editing Custom Fields
If you have defined any custom fields for your project, you will see them listed below the basic demographic information.
When creating a custom field for your project, you will be given the option to select a Coordinator Editable and a Participant Editable checkbox. The “Coordinator Editable” checkbox allows coordinators to edit the custom field in the Participant Info tab or via the MyDataHelps REST API. The "Participant Editable" checkbox allows participants to modify the value of the custom field by using the MyDataHelps REST API. Custom Fields are always editable via surveys and schedules regardless of these setting. Contact us to learn more about using the MyDataHelps REST API to update custom fields.
If the "Coordinator Editable" checkbox for a custom field has not been selected, it will be grayed out and you will not be able to edit it in the participant viewer.
The editor for each custom field will depend on the data type you selected. For example, a date field will allow you to select a specific or relative date, and a number field will ensure that you've entered a number.

Notifications
The Notifications tab displays all notifications that MyDataHelps attempted to send to the participant, including sent date, notification identifier, type, delivery status, delivered to address/number, sent by, and a snapshot of the content. Additionally, the study team can manually send a notification to a participant from this tab.
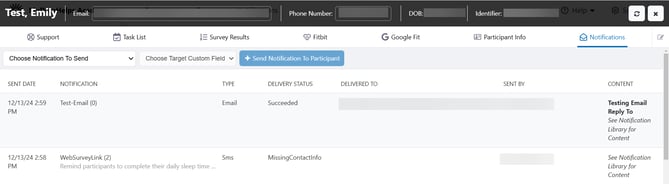
This is recommended for studies that utilize participant notifications, as it can be especially helpful for troubleshooting to understand what communications a participant has received.
Custom View URL
This option allows you to create a custom view using view builder that you can add as a tab for the study team. For example, if you wanted to troubleshoot a participant issue, you could create a new tab called Participant Dashboard that displays the same link used for the Dashboard in the App Layout settings of your project.
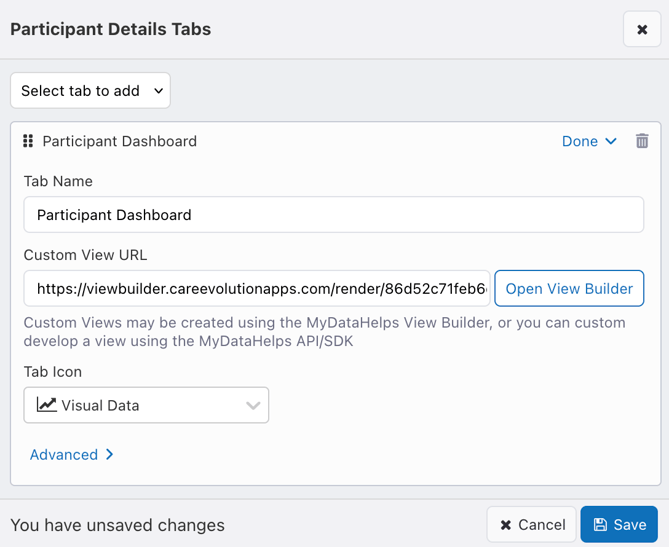
The Custom View URL feature could be especially useful if your project has unique features, such as rewards.