If you have a list of potential participants and their email addresses, you can invite them via email. This email will typically contain a link to complete screening and consent.
If you do not have a list of participants, see enrollment overview for additional enrollment methods offered.
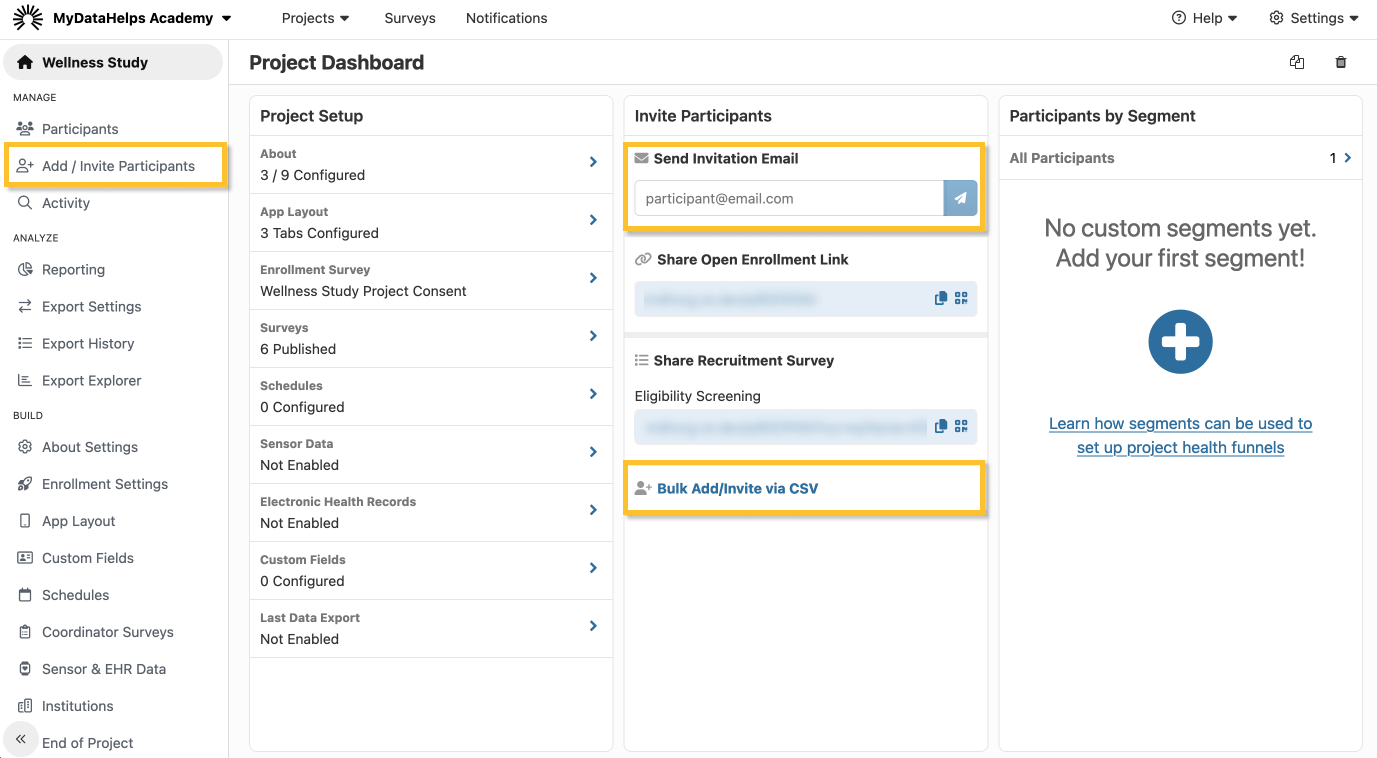
Adding Participants
You can either invite participants in bulk or individually. To quickly send an individual invitation, you can use the "Send Invitation Email" field on the project homepage; otherwise, you can bulk invite participants by navigating to the Add/Invite Participants tab.
This enrollment method requires the "Bulk Invite Participants" user permission. Users without this permission will not see these options.
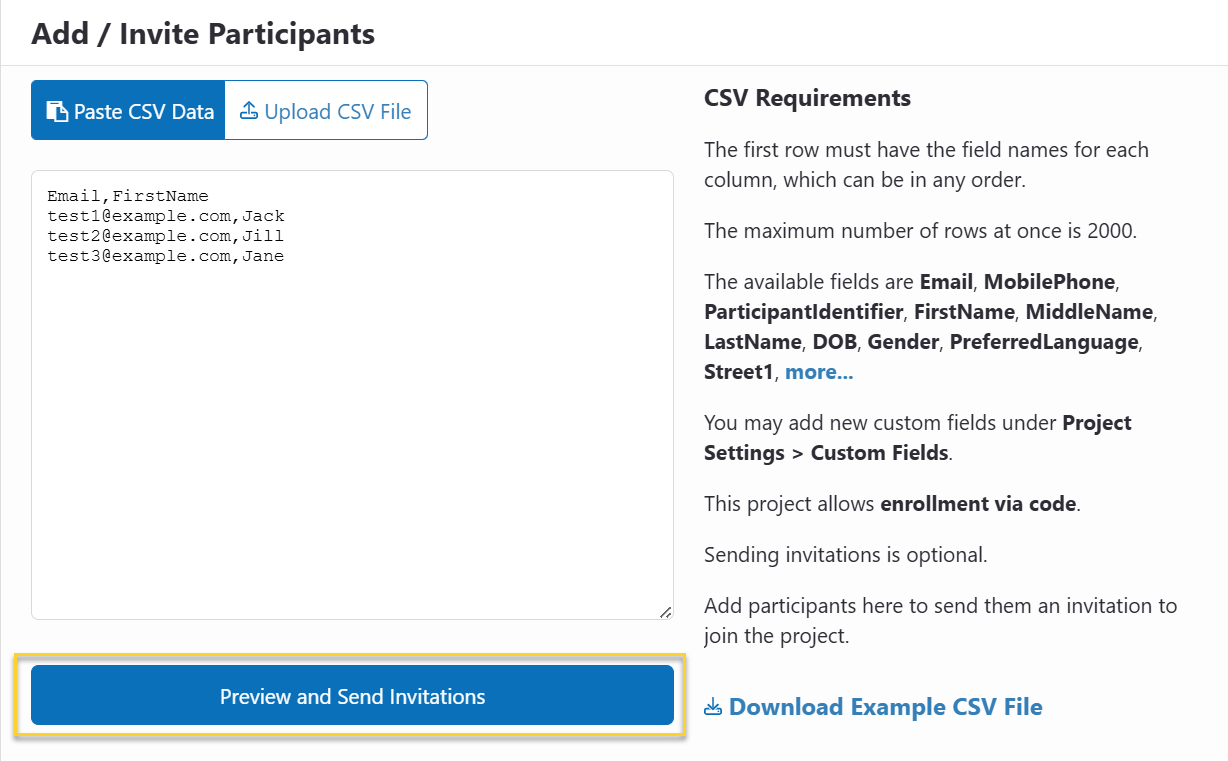
If inviting participants in bulk, once you've navigated to the Add/Invite Participants page, complete the following steps:
-
Paste in comma-separated value (CSV) data or upload a CSV file containing the participant data. For an example CSV file with participant data field suggestions, click “Download Example CSV File” at the bottom right hand side of the page.
- Select "Preview and Send Invitations".
- Confirm the data for each participant in the invitation preview, and elect whether to show the invitation in MyDataHelps and send invitation emails. These options are described in more detail below.
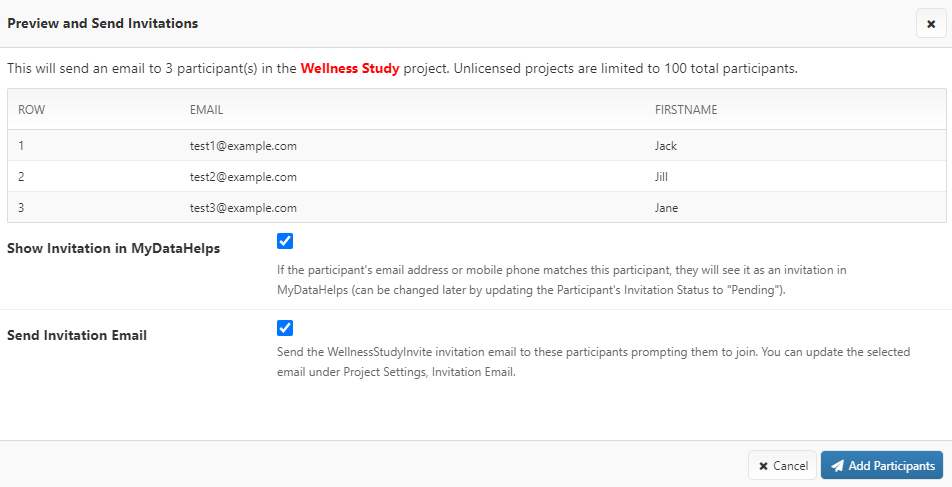
- Select "Add Participants."
No fields are required for step 1. You may skip email and/or phone number, especially if you plan to manage analog participants. ParticipantIdentifier will be automatically generated for each participant if one is not provided.
Show Invitation in MyDataHelps
"Show Invitation in MyDataHelps" is checked by default when inviting participants to join your project. By default, invited participants that have an existing MyDataHelps account will receive an invitation to join the project in the MyDataHelps app.
Send Invitation Email
"Send Invitation Email" is also enabled by default when inviting participants. There are three options for sending invitation emails to participants:
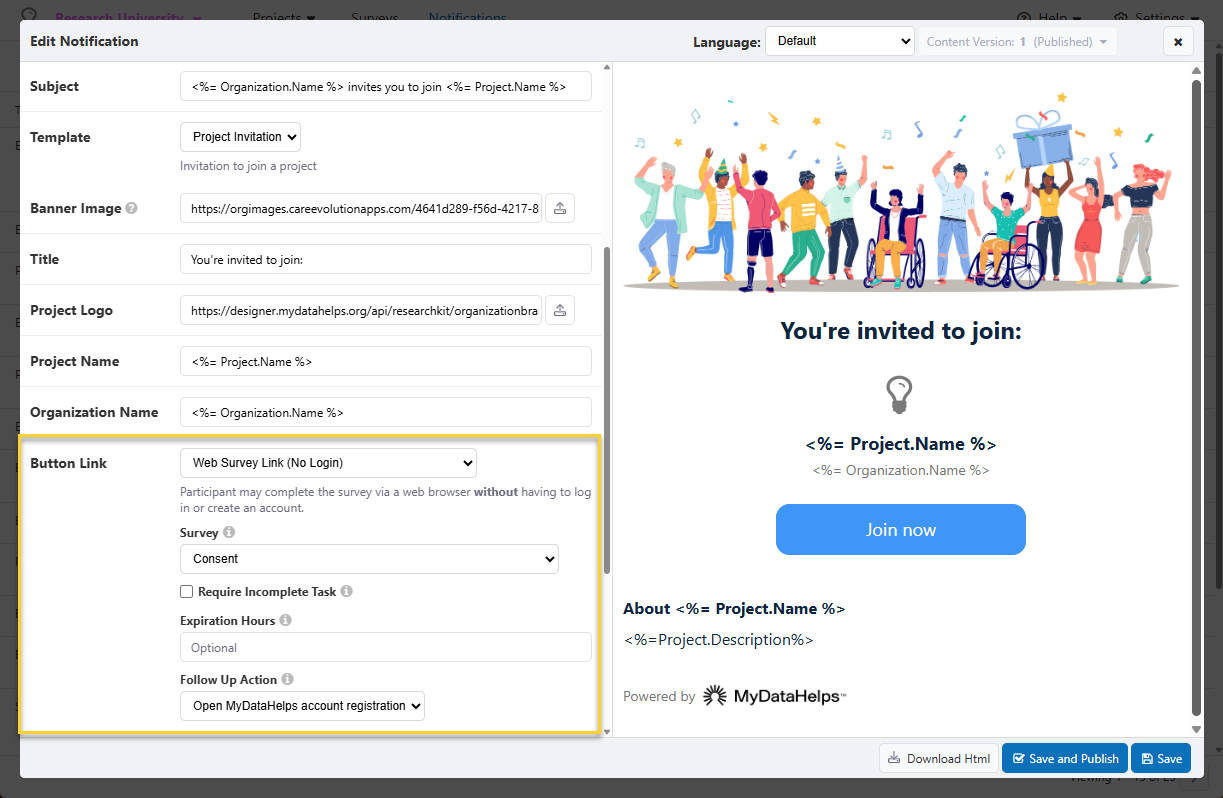
- Create a custom email notification to be used as the invitation email (recommended)
- Use the default "ProjectInvitation" email notification
- Do not send an invitation email
For new projects, the default invitation email is created using the project invitation email template and is automatically assigned to the project in Enrollment Settings. The selected invitation email notification can be updated using the Invitation Email dropdown.

Recommended Path: Create a Custom Notification
The recommended path to enrollment first consists of completing a survey before account creation. If following this flow, you can either edit the existing "ProjectInvitation" to link to your screening & consent survey followed by account registration, or you could create a new notification from scratch.
Survey links that are sent to participants via email are unique and personalized to that specific participant, so you may want to include a note in your email along the lines of:
This email and link were created specifically for you. Please do not forward this invite to anyone.
Monitoring Invitations
You can track a participant's enrollment invitation with the the Invitation Status column in segments or the Invitation field on the Participant Info tab of a participant's record. There are a few different possible values for a participant's invitation:
- Not Invited: If participants were added to the project, but no project invitation sent, they will show as Not Invited on the Participant Info tab and null within a segment view.
- Pending: If you've sent a project invitation to a participant, their invitation status will automatically be set to pending. If the participant has a MyDataHelps account and has verified their email, they will be able to see an invitation to the project when they log in.
- Cancelled: This is a status you can manually set to rescind a project invitation to a participant.
- Declined: If the participant rejects the project invitation, their status will update to declined.
You can manually adjust a participant's invitation status any time from the Participant Info tab. Once a participant is enrolled, the invitation field will be hidden from the Participant Info tab and cleared from the segment view. The participant will now have an Enrollment Date populated.