MyDataHelps Designer has a few different field types that can store participant information as outlined in this article. Refer to the Participant Fields Overview article for basic information about what participant fields are, how to populate them, and how to use them.
Demographic Fields
Demographic fields capture standard participant demographic information. Below are the available demographic fields; new demographic fields cannot be created.
DemographicField.Email
DemographicField.MobilePhone
DemographicField.FirstName
DemographicField.MiddleName
DemographicField.LastName
DemographicField.DateOfBirth
DemographicField.Gender
DemographicField.PreferredLanguage
DemographicField.Street1
DemographicField.Street2
DemographicField.City
DemographicField.State
DemographicField.PostalCode
DemographicField.UtcOffset
The MobilePhone field only accepts 10 digits, e.g., 5557778888. However, if you are populating it via survey and using the phone number answer format, the user will see (555) 777-8888 during input.
MyDataHelps calculates Age based upon DemographicField.DateOfBirth, which can be used from the Demographic Field category in segment and schedule logic.
Identifier Field
The ParticipantIdentifier field captures the primary, project-specific identifier, unique to the participant. By default, this is generated and assigned automatically when the participant is created (whether by filling out a recruitment survey, being invited by a coordinator, etc.). You may configure a custom pattern for this identifier or pre-specify a complete identifier if you create participants in advance.
Custom Fields
For any other type of information to collect about a participant, you can create your own project-specific custom fields. Custom fields can be immensely powerful to your project and most projects will have custom fields that are available in a few different formats:
Custom fields are restricted to letters, numbers, and/or underscores (Word characters). Using CamelCase is recommended for ease of readability. Legacy projects may have custom fields with other characters, including spaces. These legacy fields will not be impacted. However, users will be restricted to Word characters only for any custom fields they add to their legacy projects moving forward.
- Date: You might consider storing important date information (e.g., SurgeryDate or DiagnosisDate) in a custom date field.
- Decimal: You might consider storing precise data (e.g., Weight) in a custom decimal field.
- Email: While there is already a demographic email field, additional custom email fields can store a secondary or caretaker’s email address.
- Integer: Similar to decimal, but stores integer (e.g., PriorPregnancies) in a custom integer field.
- Phone: Similar to email, but you might consider storing a secondary or caretaker’s phone number.
- Picklist: A field with pre-specified values that can be selected from a drop-down in many places. Refer to the Custom Field: Picklist article for further details.
- Text: You might want to store a string (e.g., StudySite) in a custom text field.
- Timestamp: Similar to date, but you can store a precise timestamp (e.g., ChildDelivery).
- Time of Day: Stores a specific time of day that can be used to trigger event-based and date-based schedules at a time specific for each participant (e.g., send a notification every day at NotificationTime).
Creating Custom Participant Fields
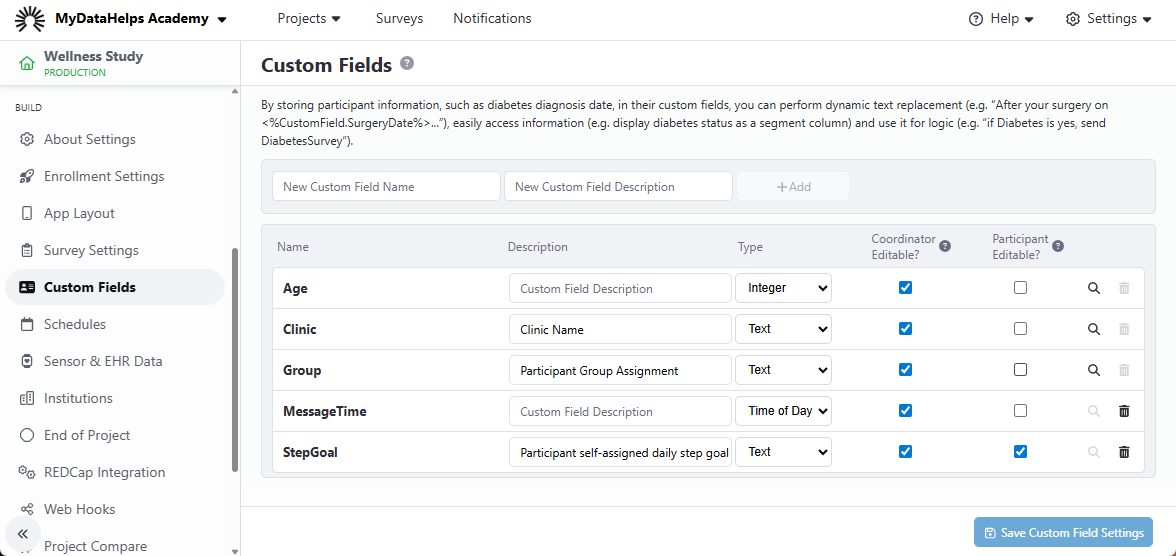
While demographic and identifier fields cannot be created, you can create any number of custom fields to fit your project needs. To create a custom field:
- Navigate to your project and click on the Custom Fields tab.
- Add a name for your custom field (we strongly recommend using CamelCase for ease of readability).
- Optionally, add a description to your custom field and then click Add.
- You’ll now have the option to change the custom field format (see the above format descriptions) from the drop-down list. The default is “Text”.
-
Optionally, enable this field to be edited through developer tools or the Participant viewer. Custom Fields are always editable via surveys and schedules regardless of these settings.
-
The “Coordinator Editable” checkbox allows coordinators to edit the custom field in the Participant List, Participant Info tab, or via the MyDataHelps REST API.
-
The "Participant Editable" checkbox allows participants to modify the value of the custom field using the MyDataHelps SDK. Contact us to learn more about using the MyDataHelps REST API or SDK to update custom fields.
-
-
After adjusting your custom field, make sure you click “Save Custom Field Settings”.
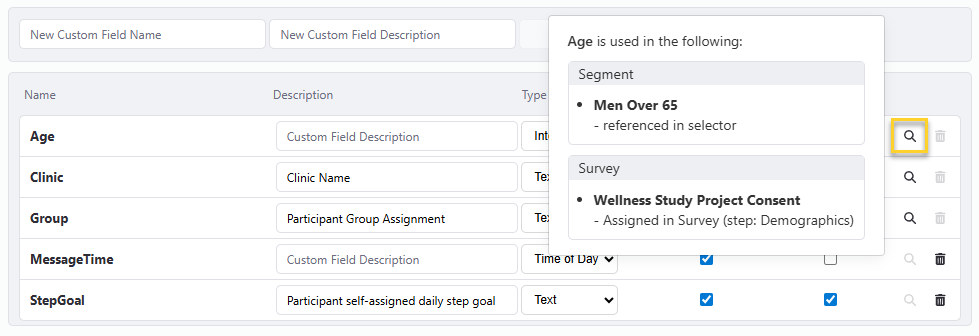
Within the Custom Fields tab, you can also see where that custom field is referenced throughout the project, by hovering over the magnifying glass icon.
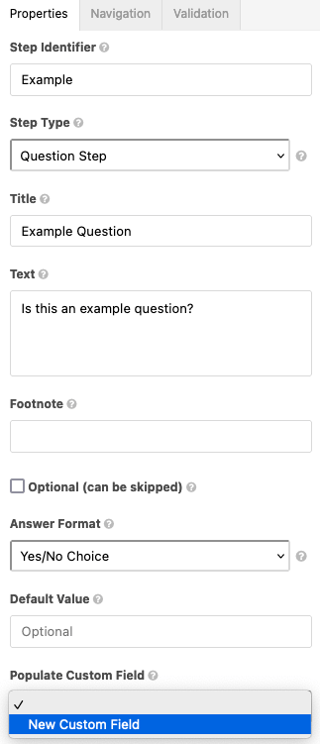
Alternatively, you can also create a custom field from the Populate Custom Field drop-down within a survey step’s properties by selecting “New Custom Field”.