Populating Participant Fields
You have a few different options to populate your participant fields, which are outlined in this article. Refer to the Participant Fields Overview article for basic information about what participant fields are, the types of fields, and how to use them.
A few participant fields are automatically populated:
- DemographicField.Email: Unless inviting a participant by email, their email address will automatically be populated based upon their MyDataHelps account when joining a project.
- ParticipantIdentifier: This field’s value is automatically generated when a participant is added to a project. If inviting a participant by CSV upload, the ParticipantIdentifier can be added to the CSV manually or left to the system to generate upon upload.
Participant Surveys
One of the more common ways to populate a demographic or custom field is by saving a participant’s survey answer into the field. For example, a participant could be prompted to provide their diabetes diagnosis date in a survey, populating your DiabetesDiagnosis custom date field.
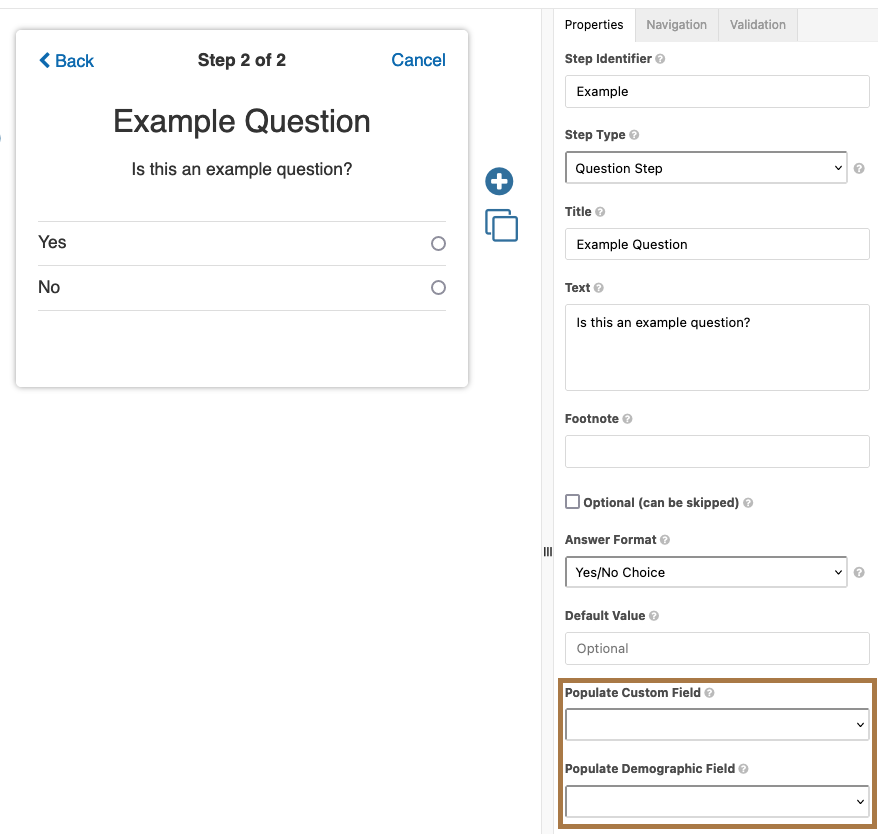
To set a demographic or custom field from a survey answer, find the “Populate Demographic Field” or “Populate Custom Field” option within the right pane on the Step’s Properties tab. Only the following step types can populate a demographic or custom field:
- Question
- Form (for an individual form item)
- Web View

Your demographic or custom field format and answer format must match (e.g. a custom date field and an answer date format), otherwise your demographic or custom field will not be available in the drop-down.
Coordinator Surveys
Rather than participants populating demographic or custom fields from surveys, the study team can populate values using coordinator surveys. The method to configure a survey to populate a demographic or custom field is the same as above.
While participant fields can be updated manually from the Participant Viewer, the benefit to updating it from a coordinator survey is that it can reduce human error or provide standard data. For example, you may provide a multiple choice reason in a coordinator survey for why a participant is withdrawing from the project and populate this answer into a WithdrawalReason custom text field. If the reason was entered manually, the text may be harder to aggregate for analysis later than standardizing the options with a coordinator survey.
Schedule Actions
For custom fields only, you can populate them via a Schedule Action. Whenever the schedule is triggered, the custom field will be updated.
Segment Actions
For custom fields only, you can populate them via a Segment Action. When manually done, this allows for the custom field’s value of all participants in the segment to be updated in bulk.
Participant Viewer
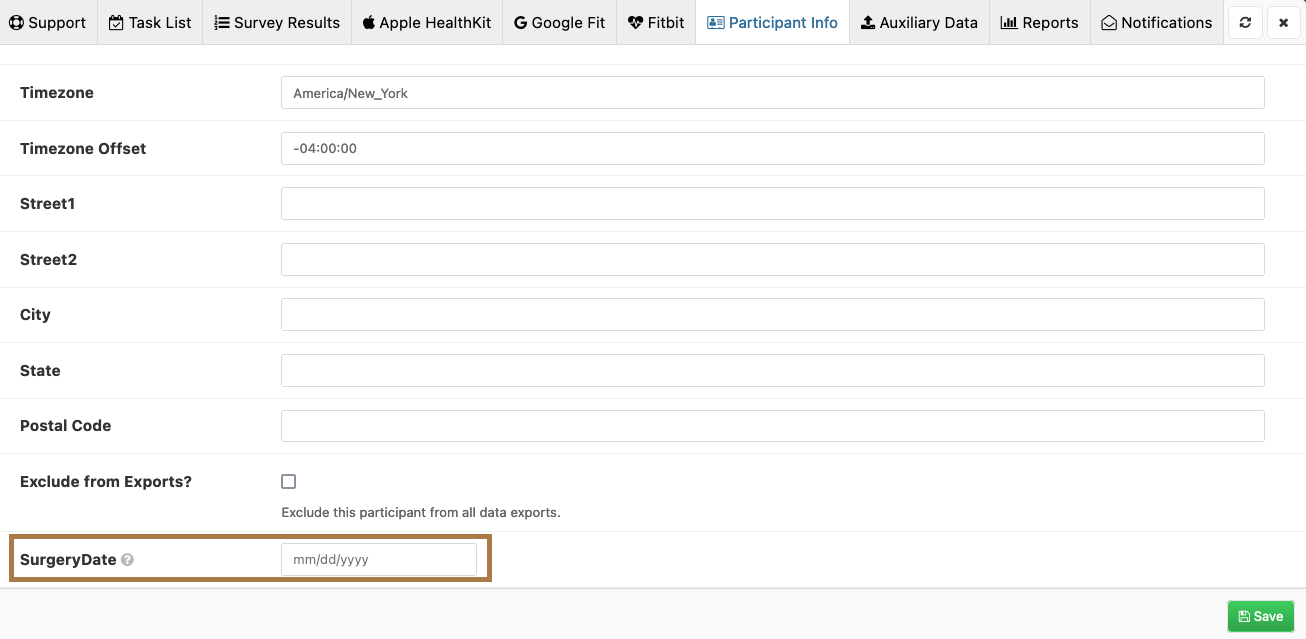
While coordinator surveys can be a better method to update demographic and custom fields, all participant fields can be viewed and most of them edited from the Participant Info tab of the Participant Viewer.
- Navigate to the Participants tab of your project.
- From your project dashboard, click into one of your segments in the “Participants by Segment” section, OR
- Navigate to your project and go to the Participants tab.
- Find the participant of interest and click on them, opening the Participant Viewer.
- Click on the Participant Info tab.
- You’ll be presented with a list of all participant fields and can manually update their values as relevant.

Participant & Segment Views
For custom picklist fields, you can populate a value from a participant or segment list view. Refer to the Custom Field: Picklist article for further details.
CSV Upload
You can also populate and update participant fields in bulk via CSV upload. If you are inviting participants to your project, you can add values to your participant fields within the CSV file. However, the same method can be used even after a participant has been invited to update their field values. Just follow the same instructions as outlined in the Enrollment by Invitation article, but uncheck the box to “Send Invitation Email”.
Notably, on the “Add / Invite Participants” tab within your project, you can download an example file, which will include all of your custom fields on your project within the CSV to be uploaded. 