Creating Schedules to Deliver Project Content
- Deliver surveys
- Deliver notifications
- Close surveys
- Update custom fields
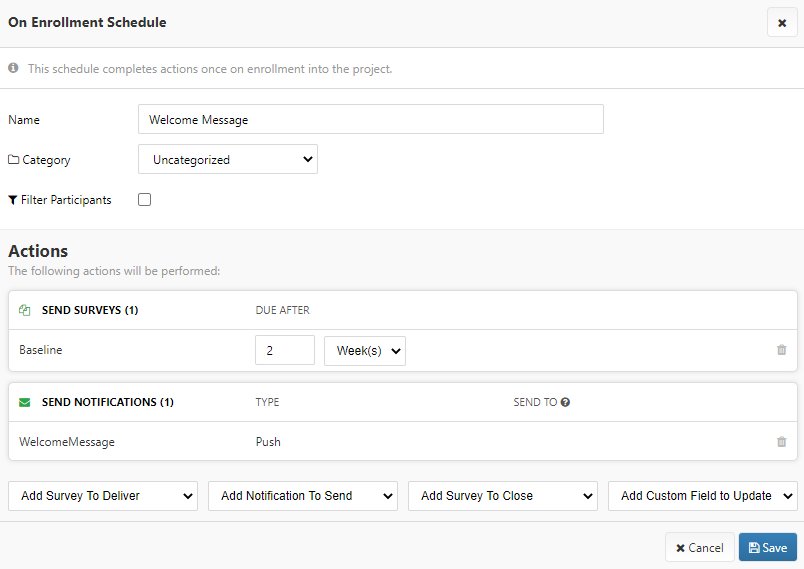
For example, you could create a schedule to send a baseline survey immediately upon enrollment to all participants. Further, you could create a schedule to send a "Congratulations!" push notification to participants upon completion of the baseline survey.
For a quick overview on getting started with schedules, watch the following video or keep reading below.
This article provides a brief overview on how to create a schedule. For more information on the different types of schedules and their additional settings, see Schedule Types. For more information on the specific actions schedules can perform, see Schedule Actions.
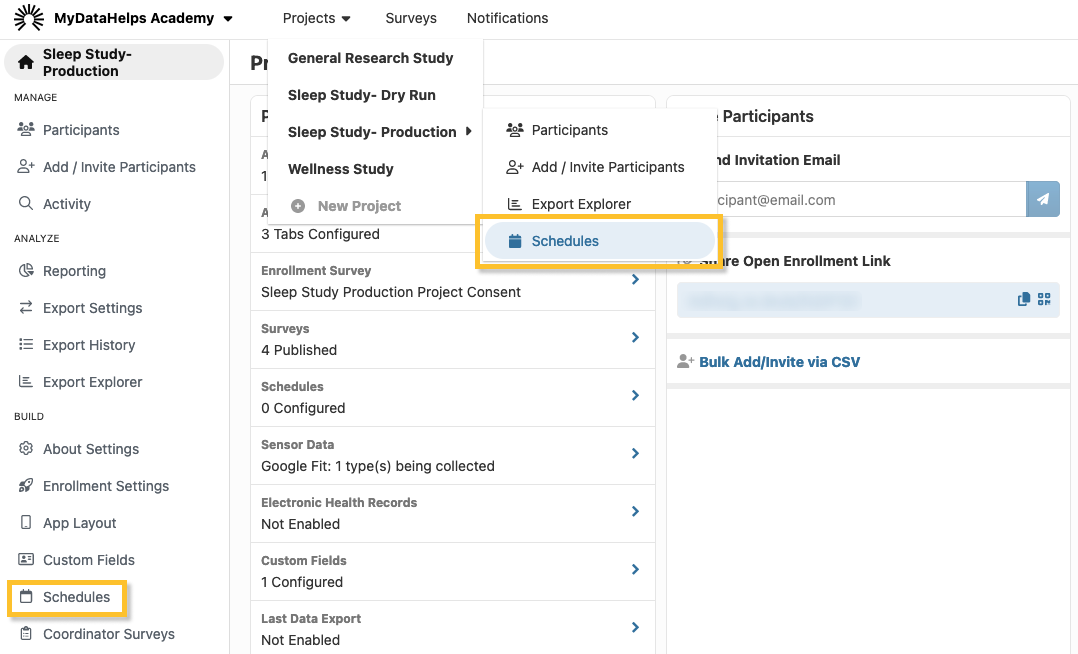
To get started, navigate to your project’s "Schedules" tab, either by clicking Schedules tab or by hovering over Projects on the top navigation bar, then clicking Schedules.

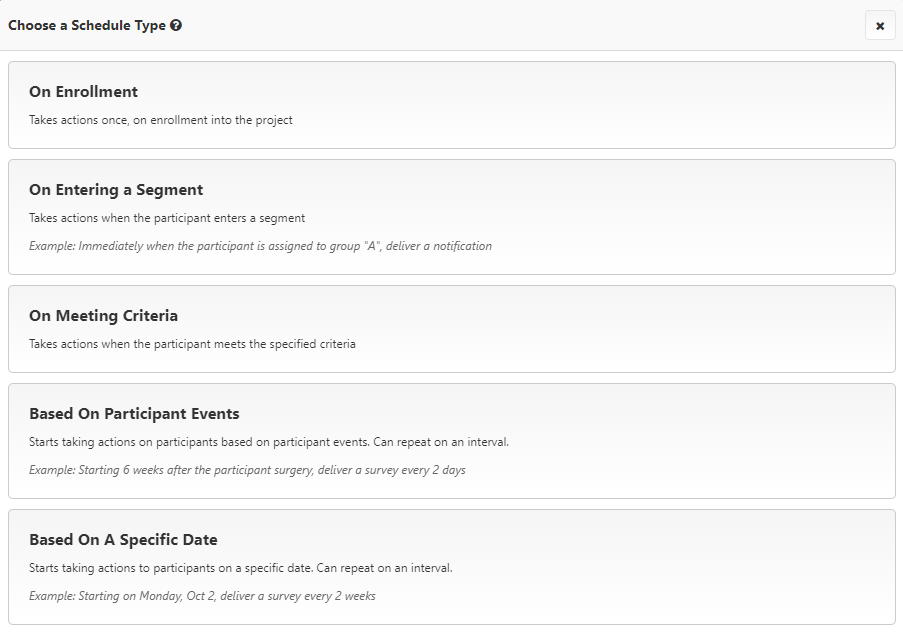
To create your first schedule, click "Add a Schedule" in the middle of the page. If your project already has existing schedules, click "Add Schedule" in the upper right corner. You will be prompted to select a schedule type. Schedules can be set to trigger on enrollment, on entering a segment, on meeting criteria, based on participant events, or on a specific date.

Finally, define the settings of your schedule, as well as the actions that should be performed when the schedule triggers, then click Save.

For more information on how to determine which types of schedules you may need, as well as an advanced schedule example, see the Scheduling Playbook article.